Student guide
Your learning journey, step by step
Everything you need to go from your first visit to your first certificate — browsing courses, signing in, taking lessons, and tracking your progress on JOBITECH Innovation Hub.
Step 1
Getting started
JOBITECH Innovation Hub (JIH) is a hands-on learning platform: seven training domains, twenty-one courses, real labs, quizzes, certificates, and leaderboards. Browsing is always free — you only need an account when you want to start learning.
Explore the home page
Open jobitechabujahub.com. The landing page introduces the platform and the skills you can build. Use the top navigation to reach the Catalogue, Paths, Pricing and the sign-in options at any time.
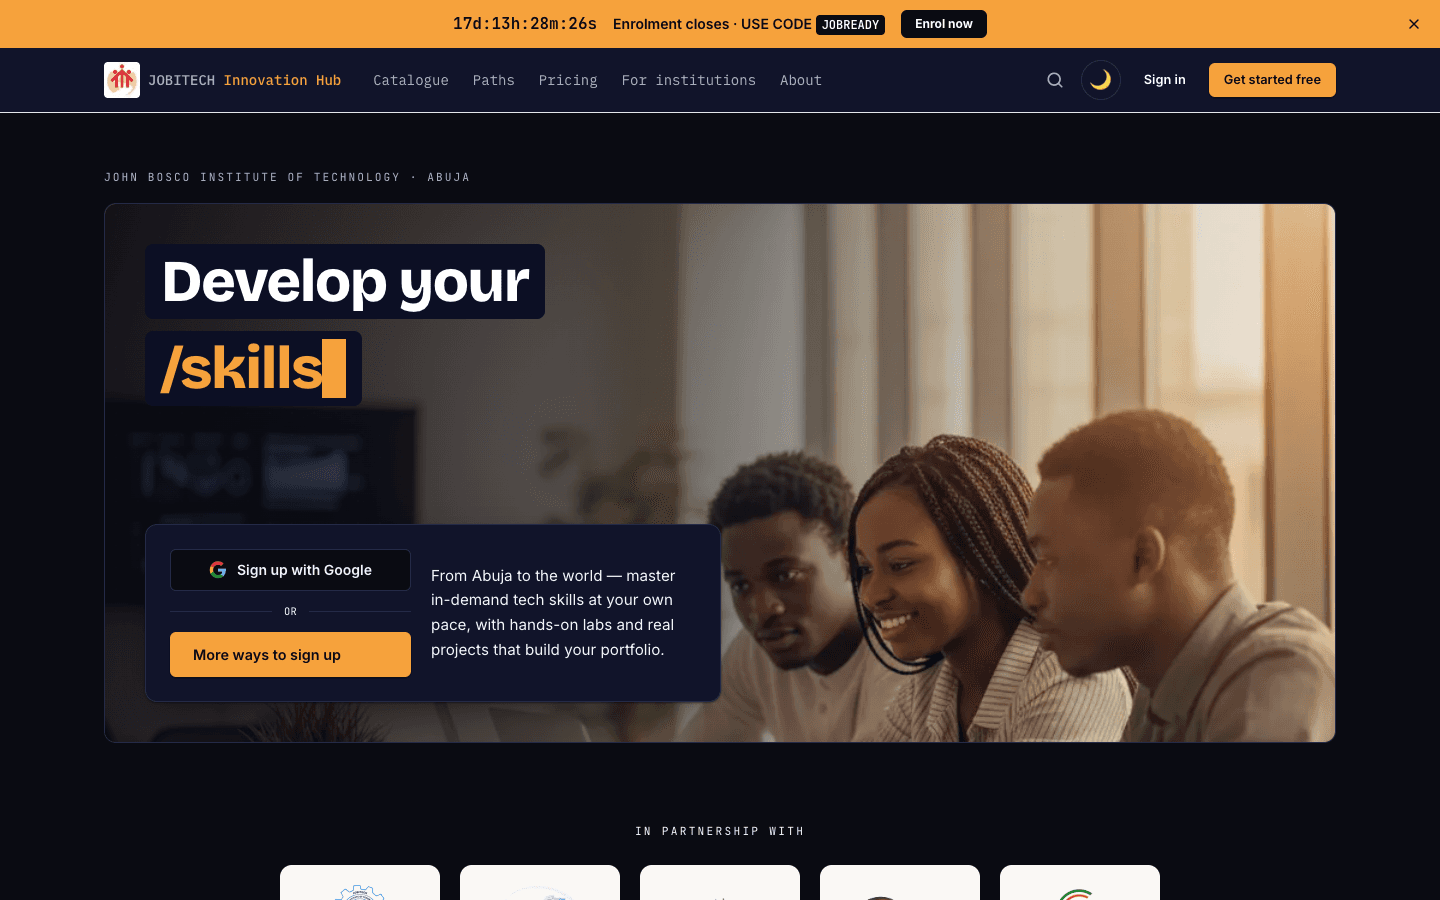
The JIH landing page with the main navigation and hero section. Choose how you get access
There are three ways to learn. A few intro courses are free forever, a monthly subscription unlocks every gated course and path, and JOBITECH students get their programme’s courses included with enrolment.
- Free — three intro courses plus full browsing of everything.
- Subscription — unlocks all gated courses, paths, labs and certificates.
- Students — courses and paths come with your JOBITECH registration.
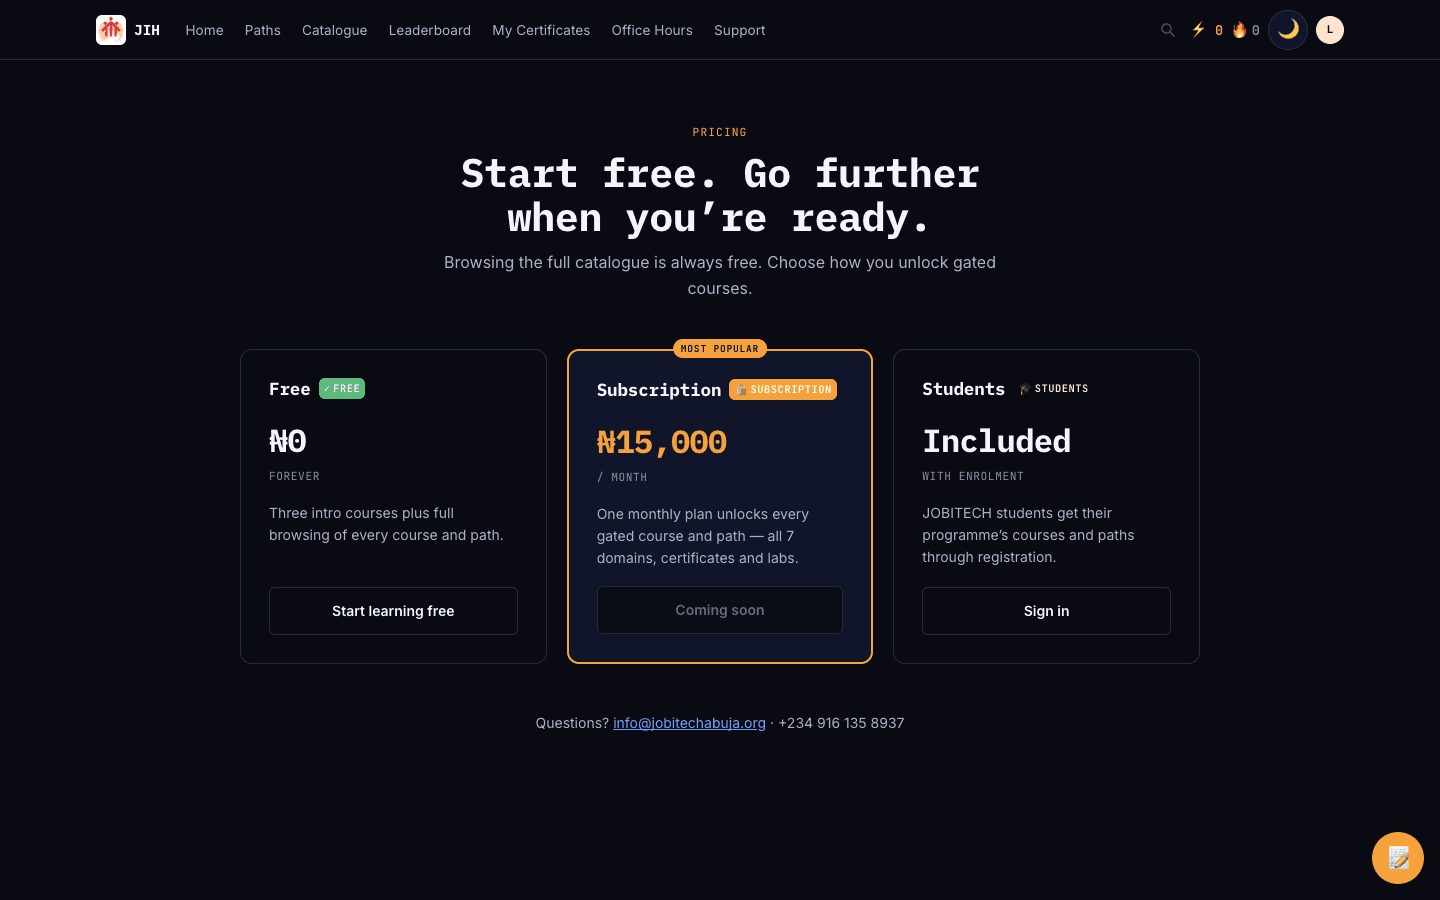
The pricing page showing Free, Subscription and Students plans.
Step 2
Create your account & sign in
Creating an account takes under a minute. You can use email and password, or continue with Google or GitHub.
Create your account
Select “Get started free”, then register with your email and a password (at least 8 characters), or continue with Google or GitHub. After registering, check your inbox for a verification email and confirm your address.
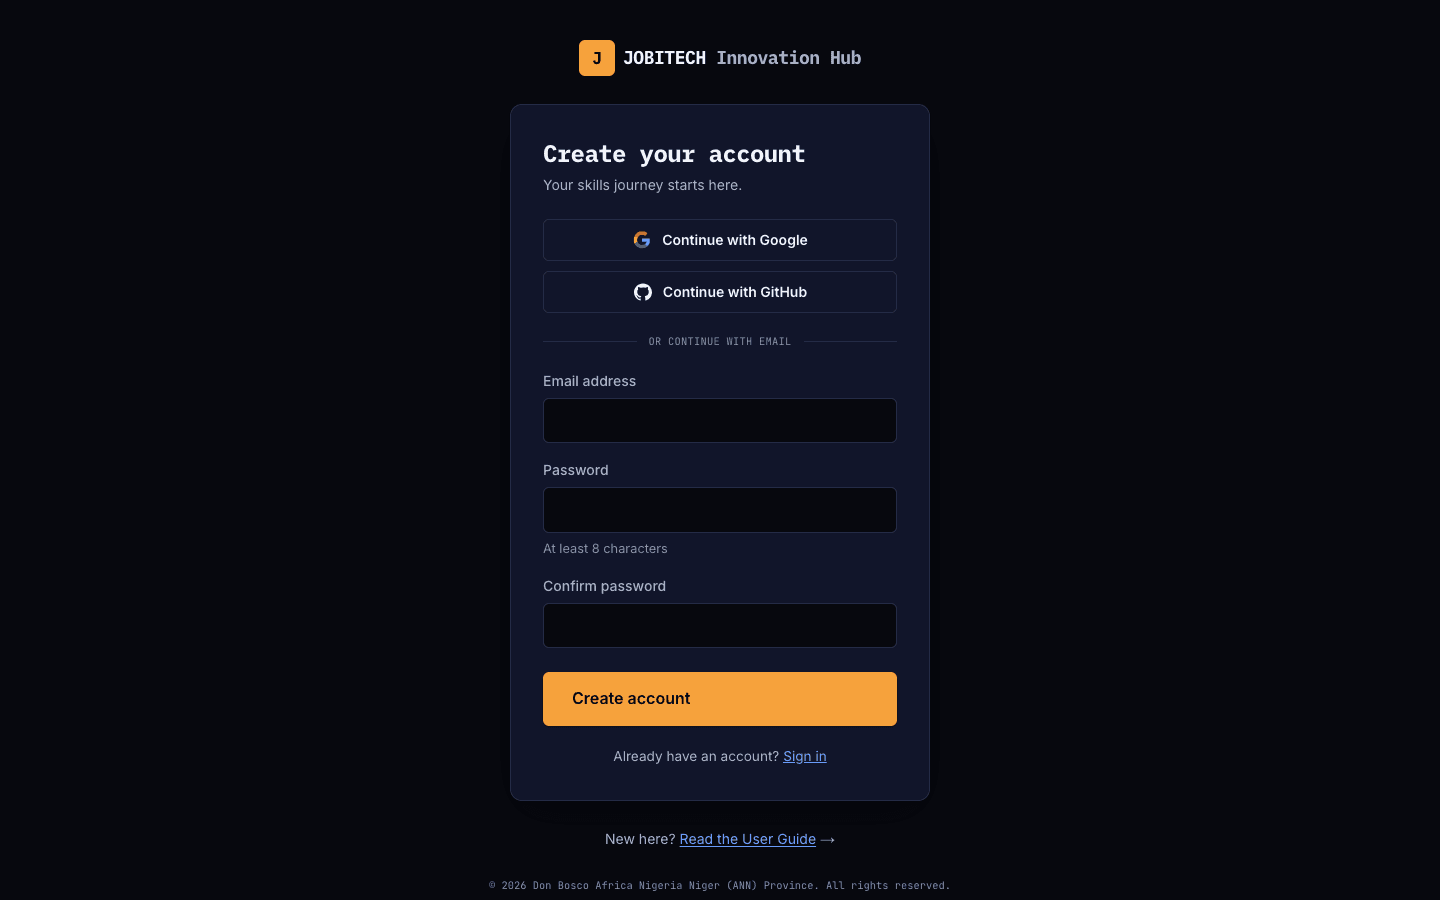
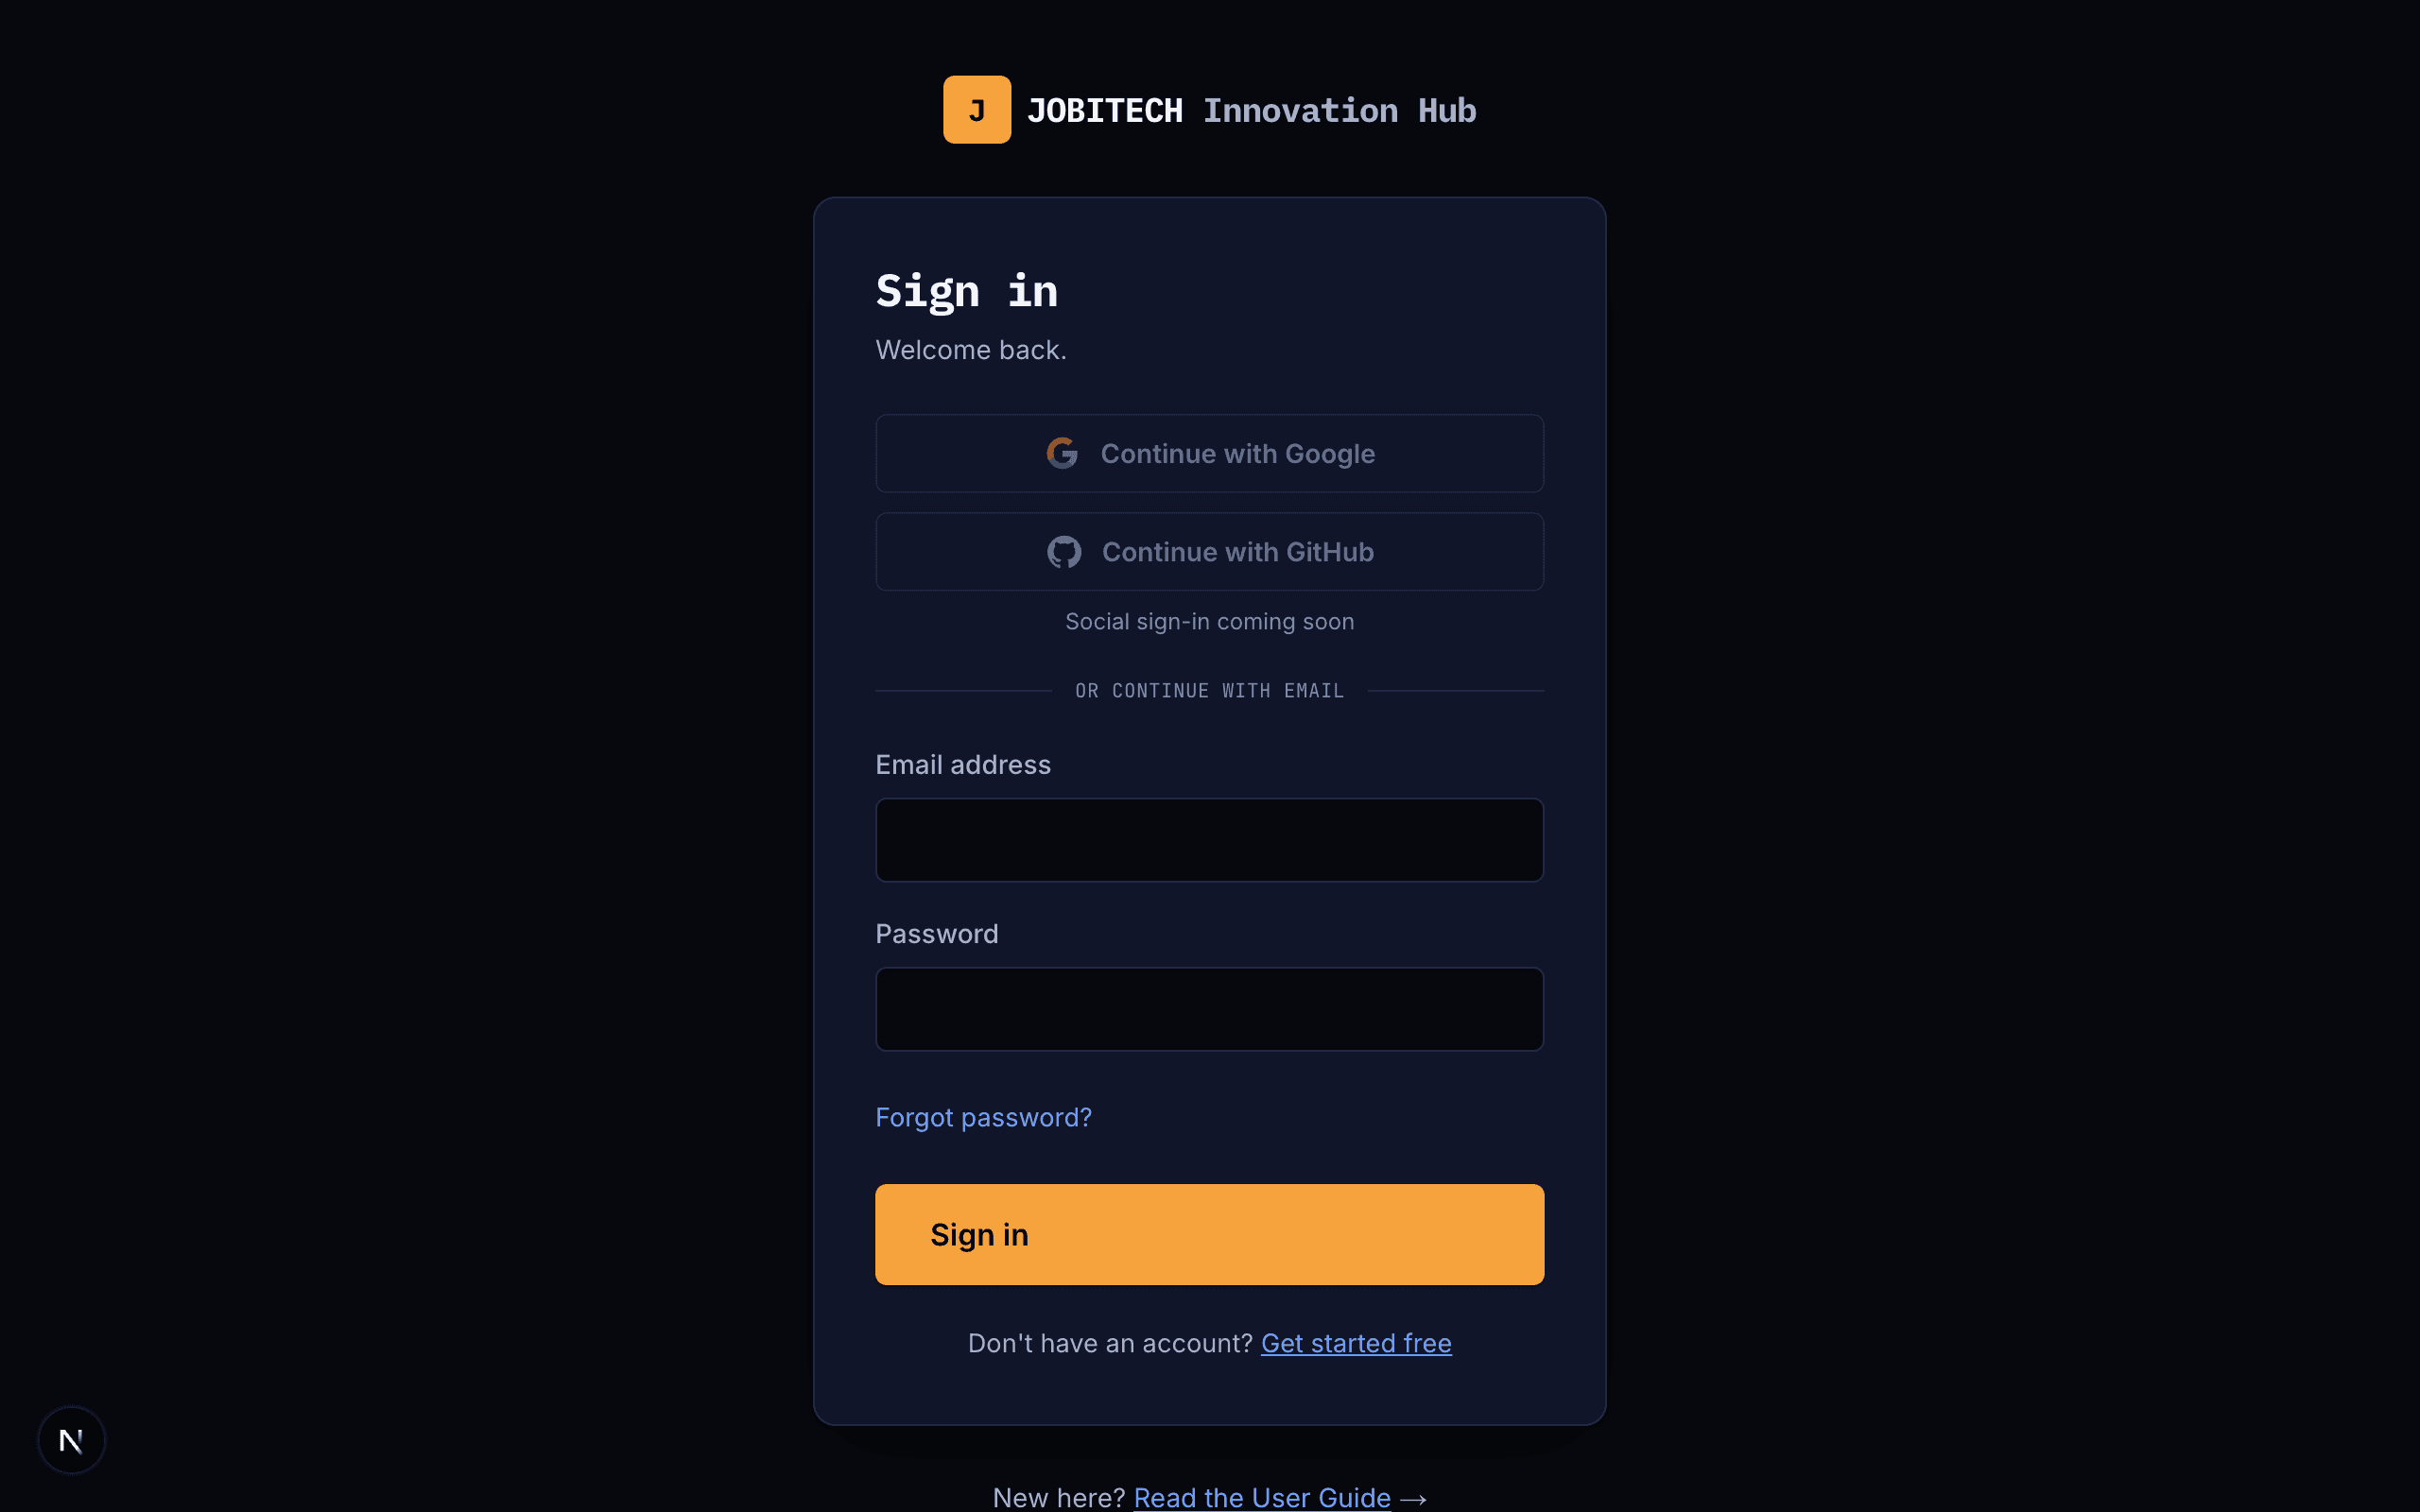
The create-account page with Google, GitHub and email sign-up options. Sign in
Returning learners select “Sign in” and enter their email and password (or use Google/GitHub). Forgot your password? Use the “Forgot password?” link to receive a secure reset email.
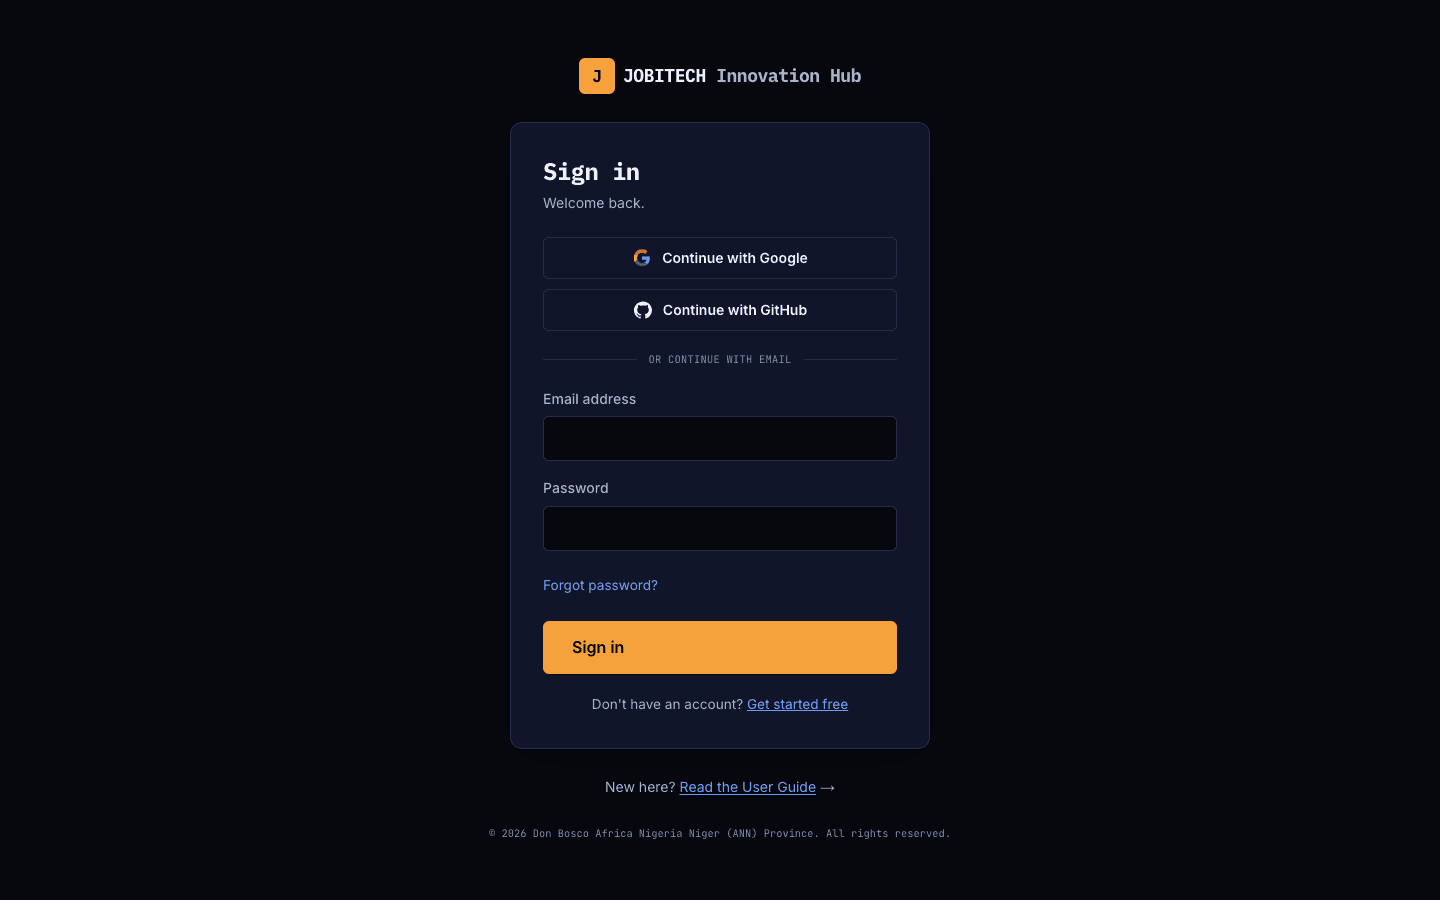
The sign-in page with email, password and social login options.
Step 3
Your dashboard
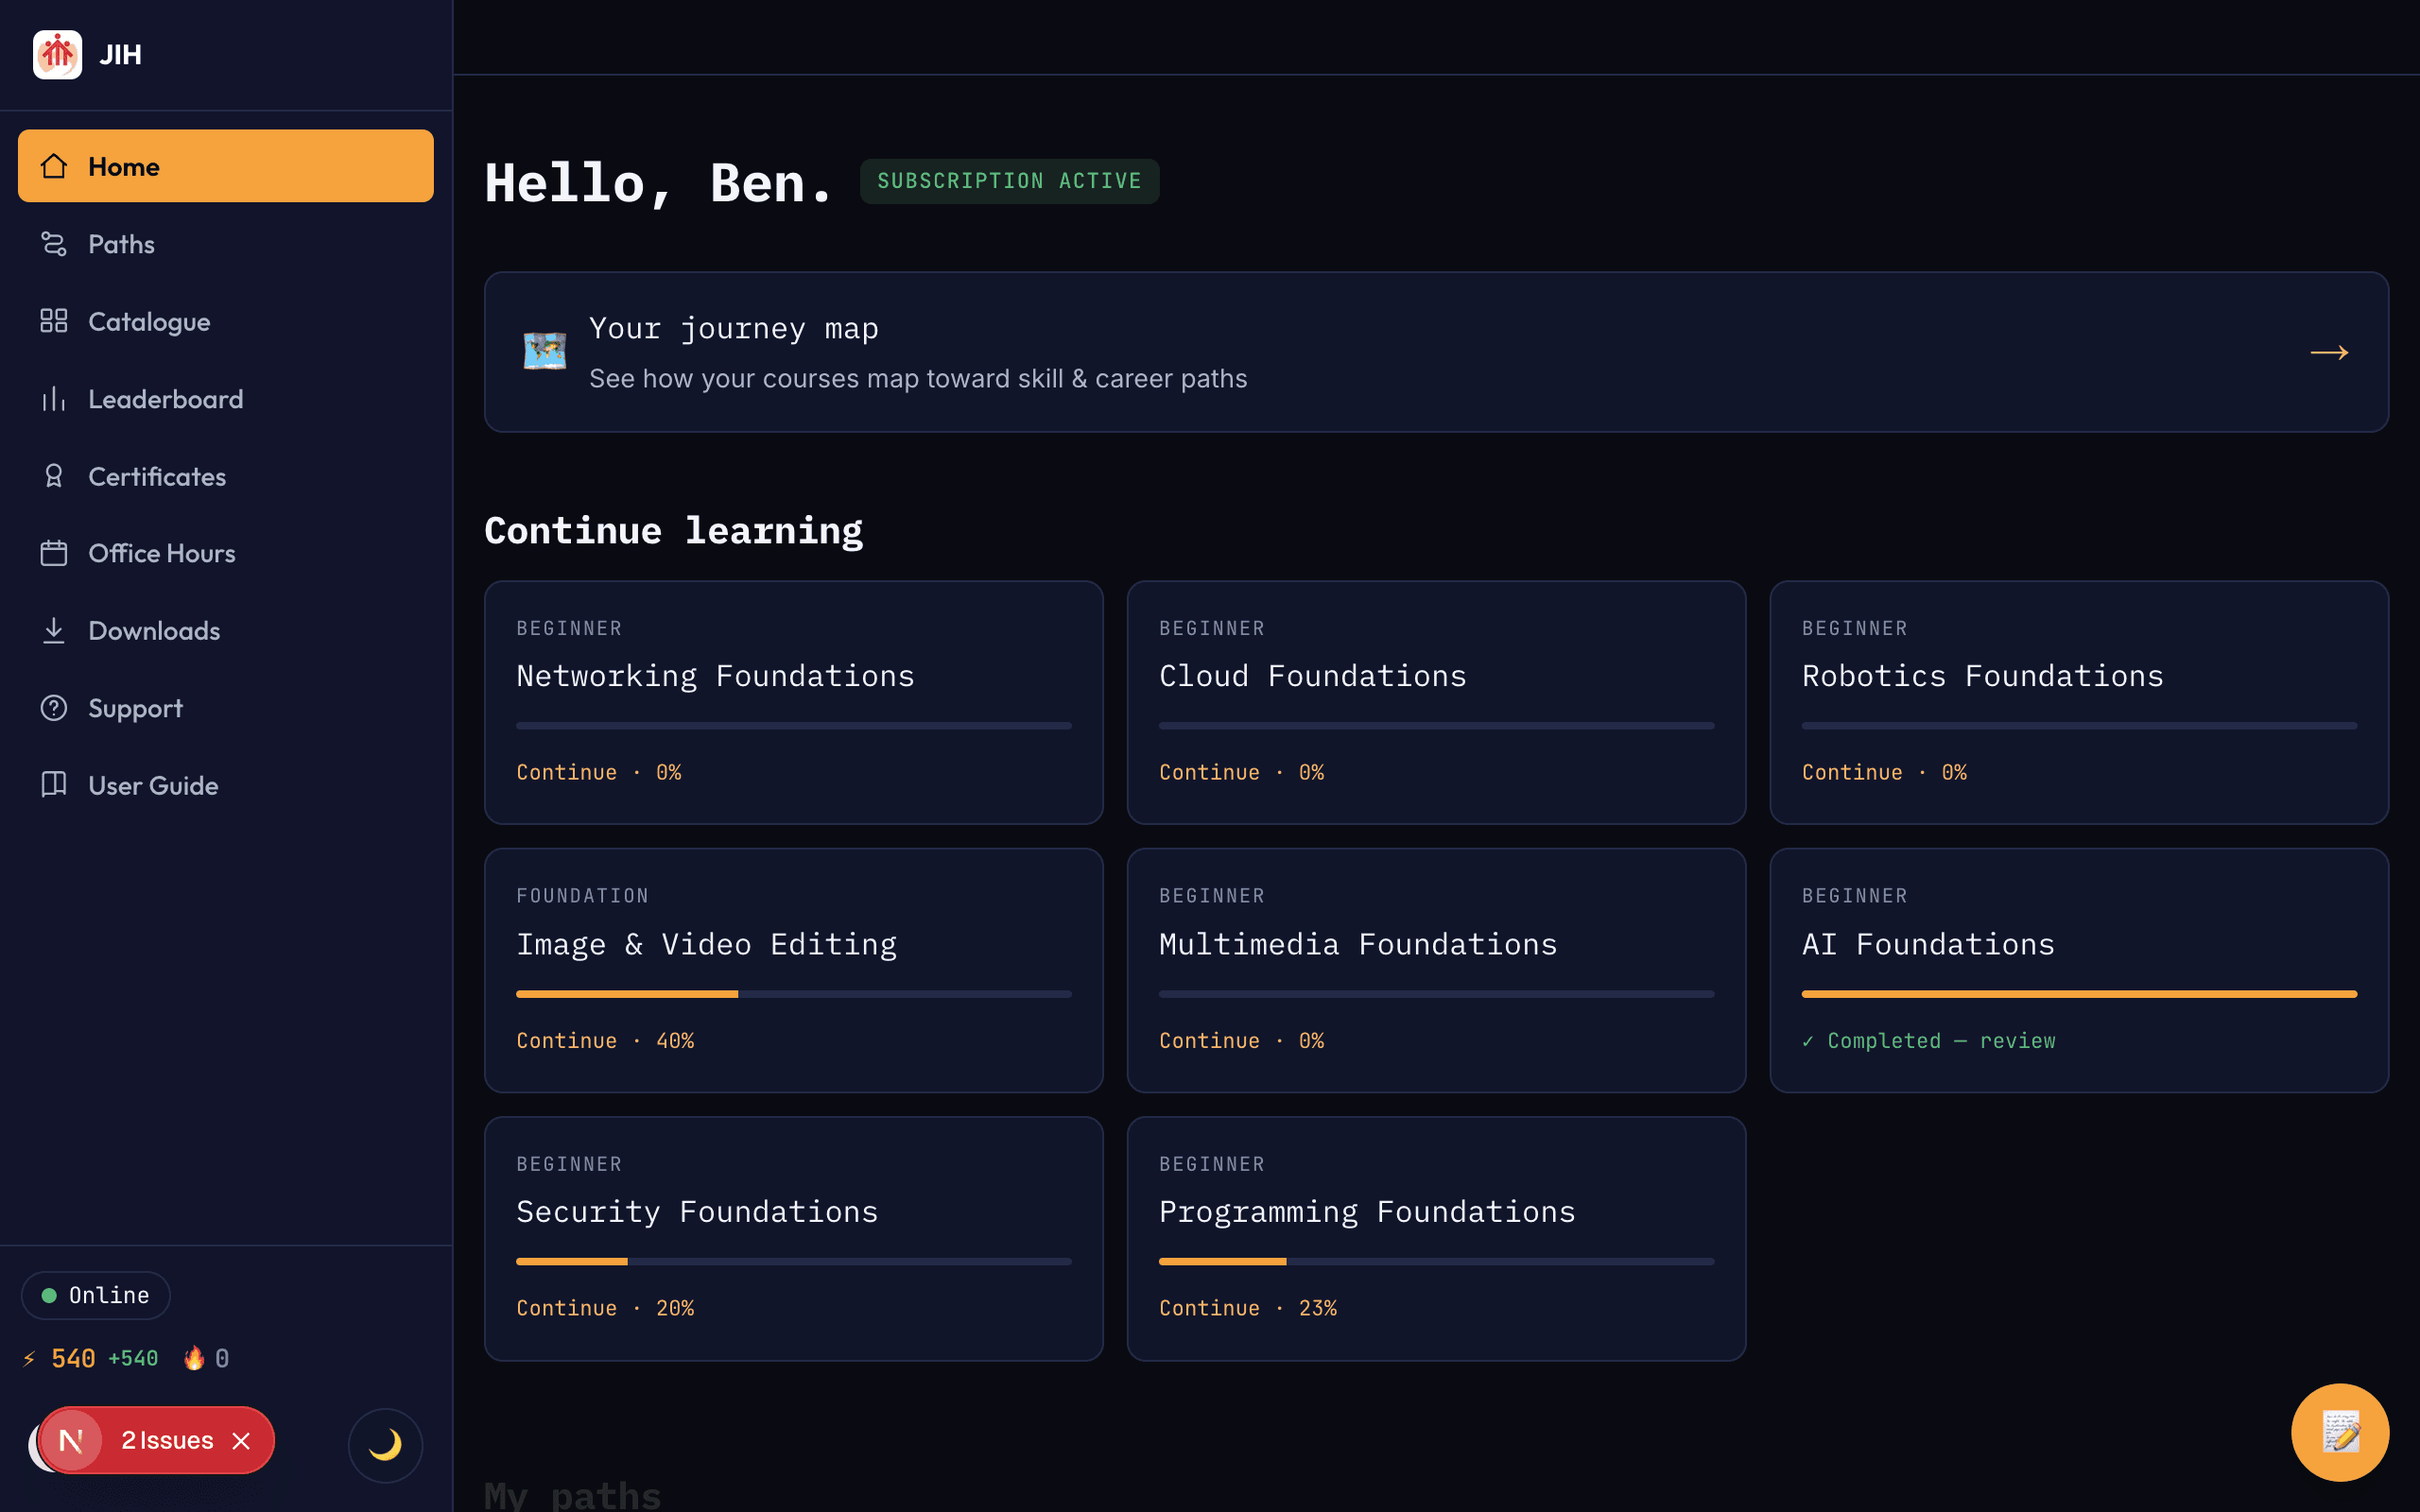
After signing in you land on your dashboard — your home base for everything you’re learning.
Pick up where you left off
The dashboard greets you and shows your access status, a shortcut to your journey map, your “Continue learning” courses with progress, and the skill and career paths you’ve joined. Click any card to jump straight back in.
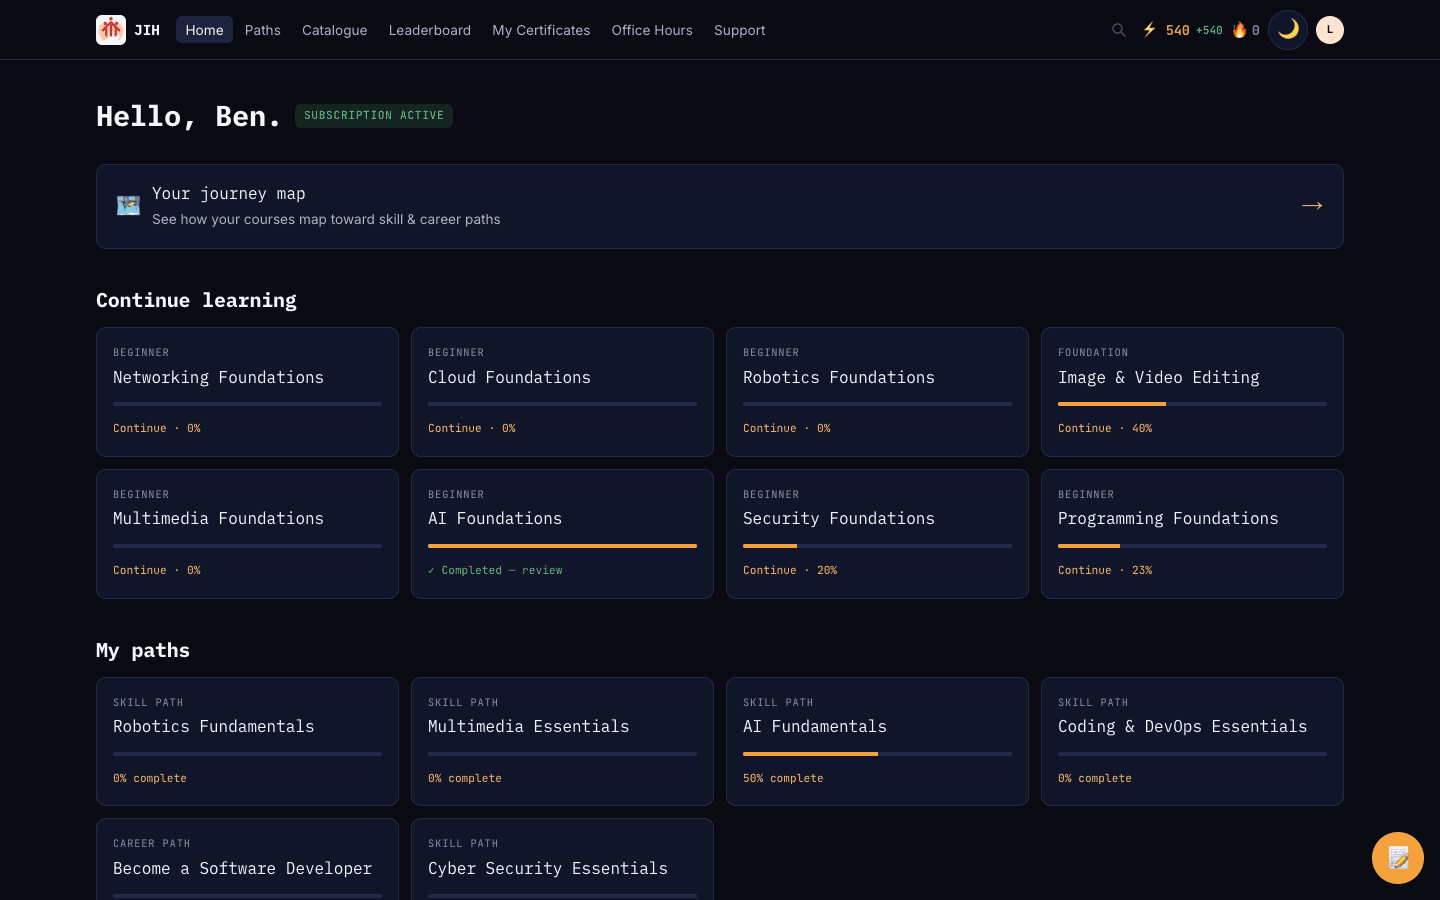
The learner dashboard showing continue-learning courses and joined paths.
Step 4
Find something to learn
Browse the full catalogue freely, or follow a curated path that takes you from your first lesson to a job-ready skill set.
Browse the catalogue
The catalogue lists all twenty-one courses across seven domains. Search by keyword, filter by domain or level, and read each card’s access badge (Free or Subscription) before you start.
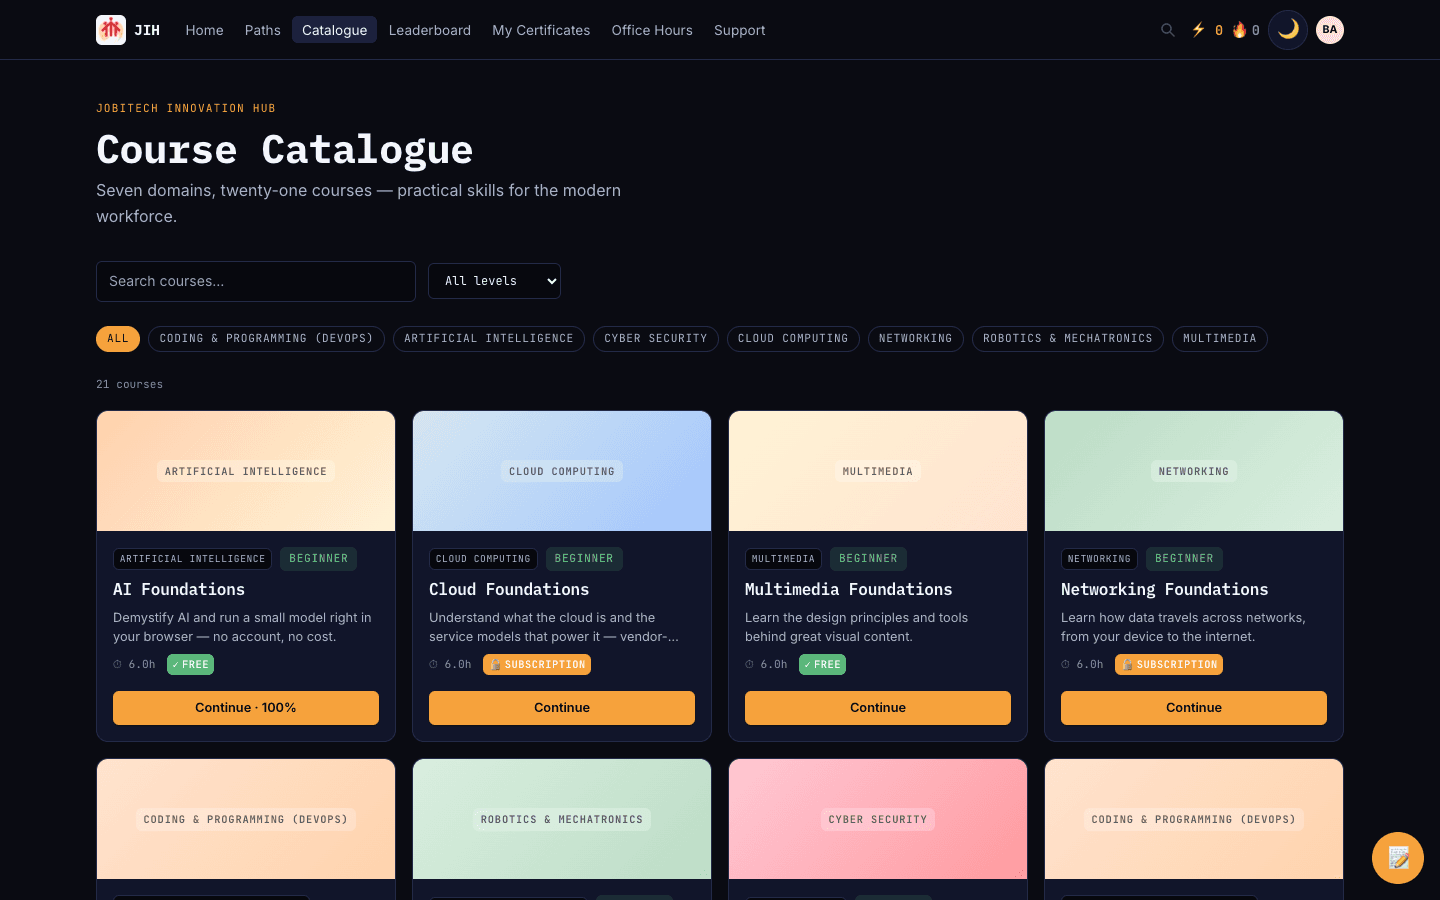
The course catalogue with domain filters and course cards. Open a course
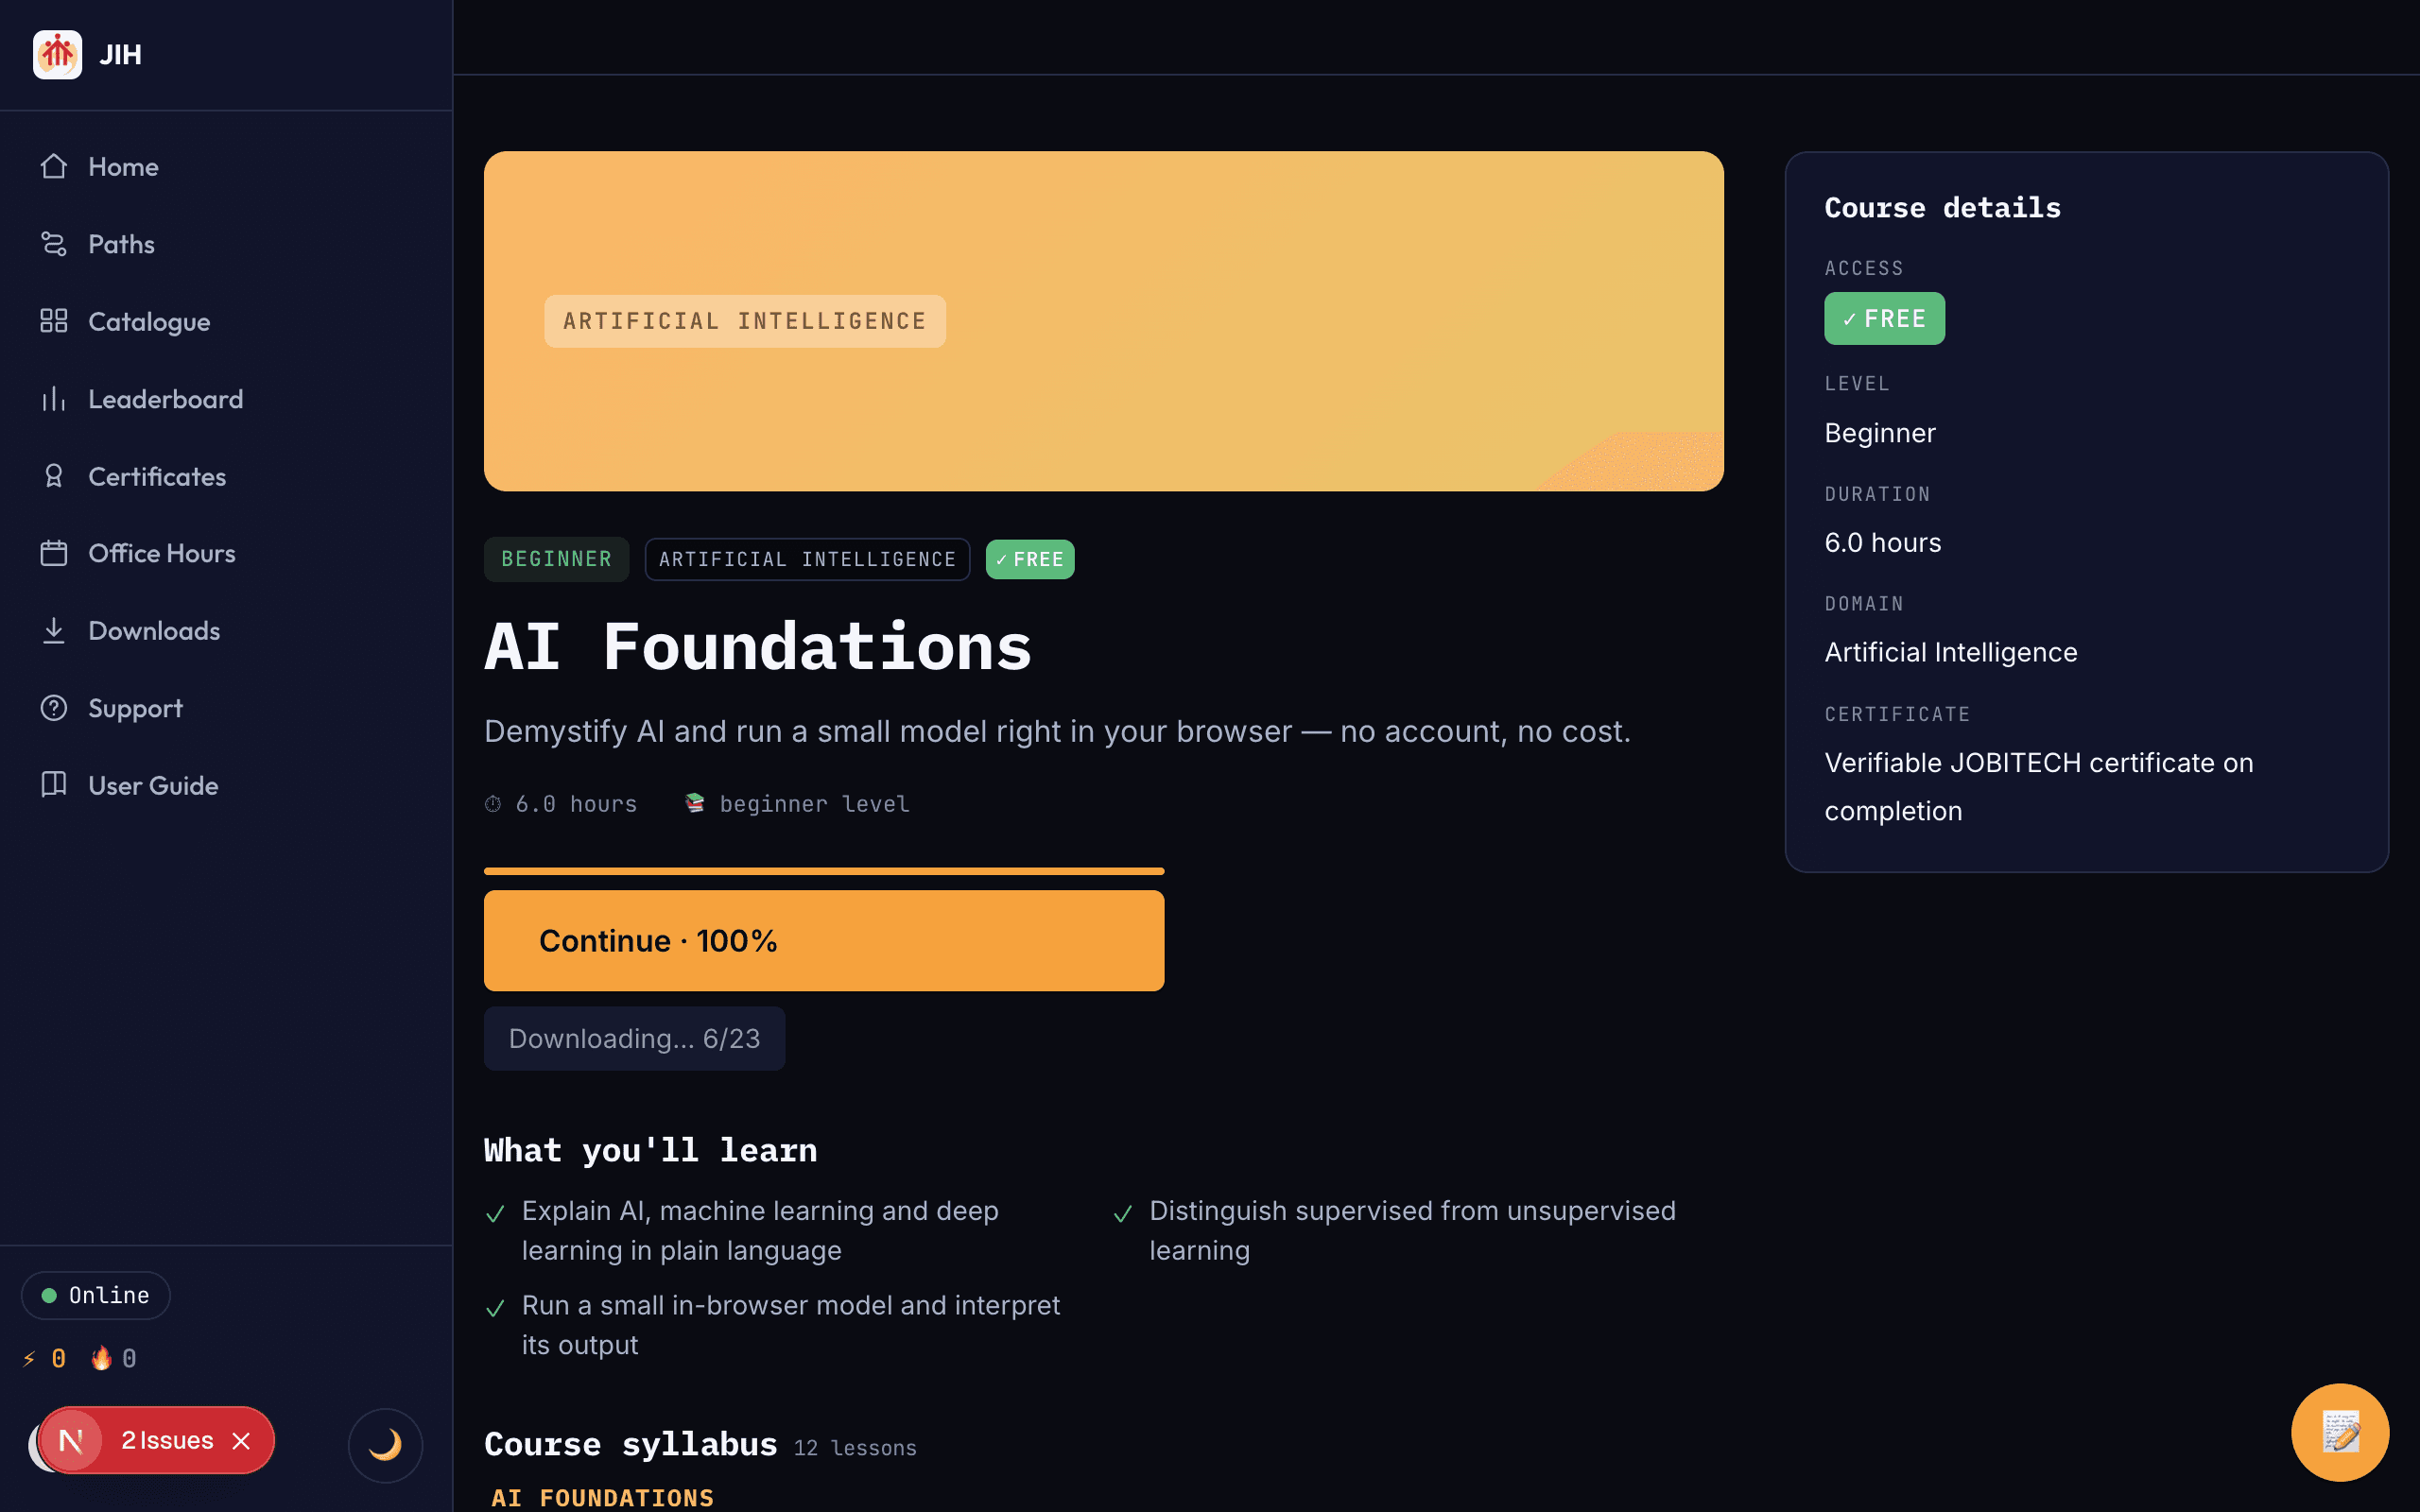
A course page shows what you’ll learn, the access tier, level, duration, and the full syllabus. Lessons unlock in order — the next lesson stays locked until you’ve fully completed the current one.
- Use “Start” (or “Continue”) to open the next lesson.
- A lock icon means an earlier lesson must be completed first.
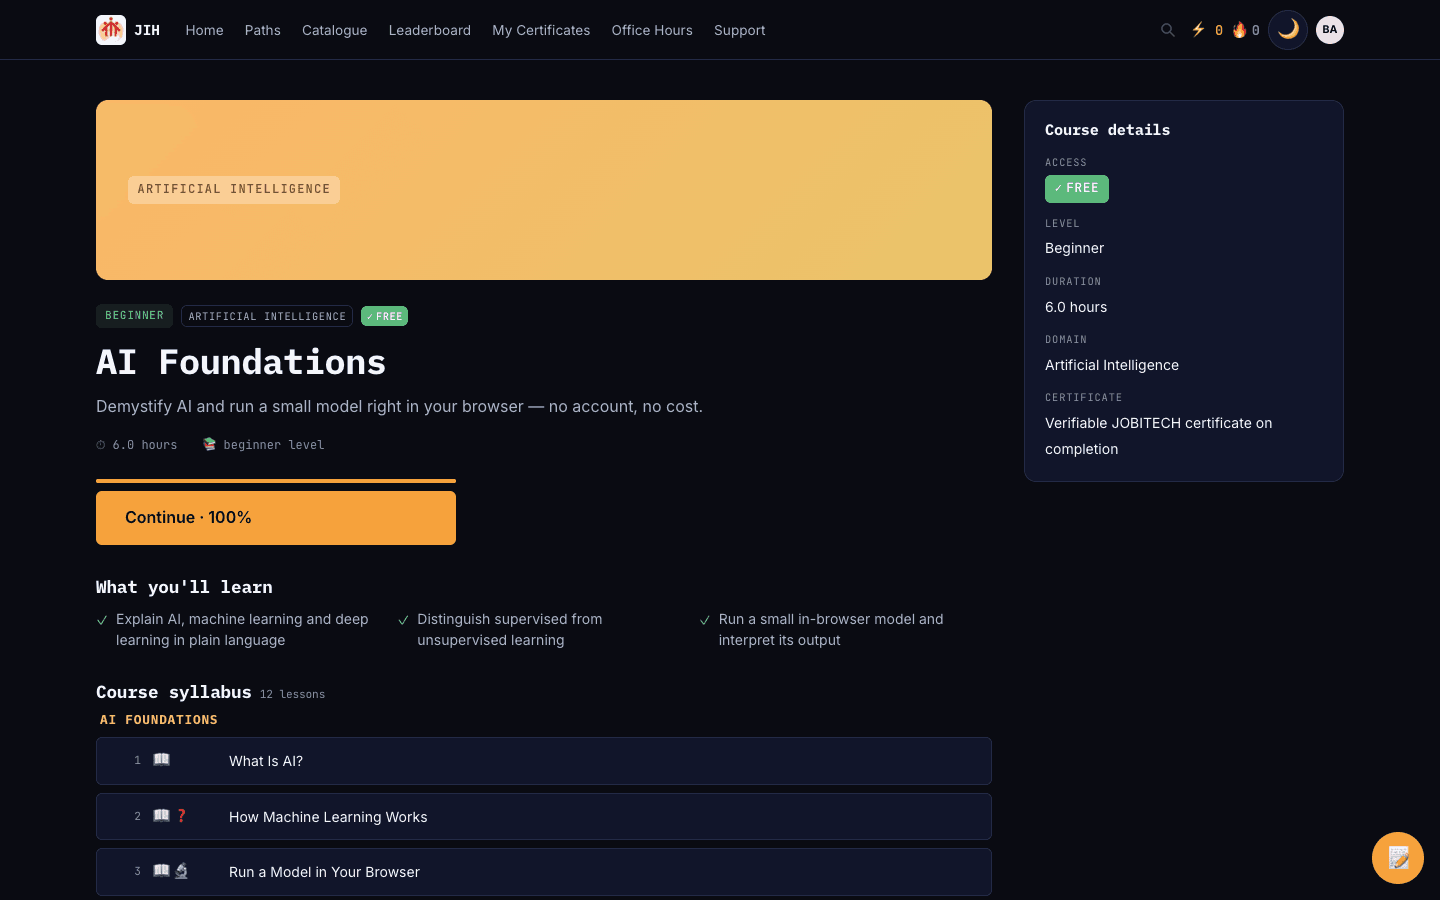
A course overview page with outcomes, course details and the lesson syllabus. Follow a skill or career path
Prefer a guided route? Career paths (“Become a…”) and skill paths bundle courses into an ordered sequence with milestones, so you always know what to learn next.
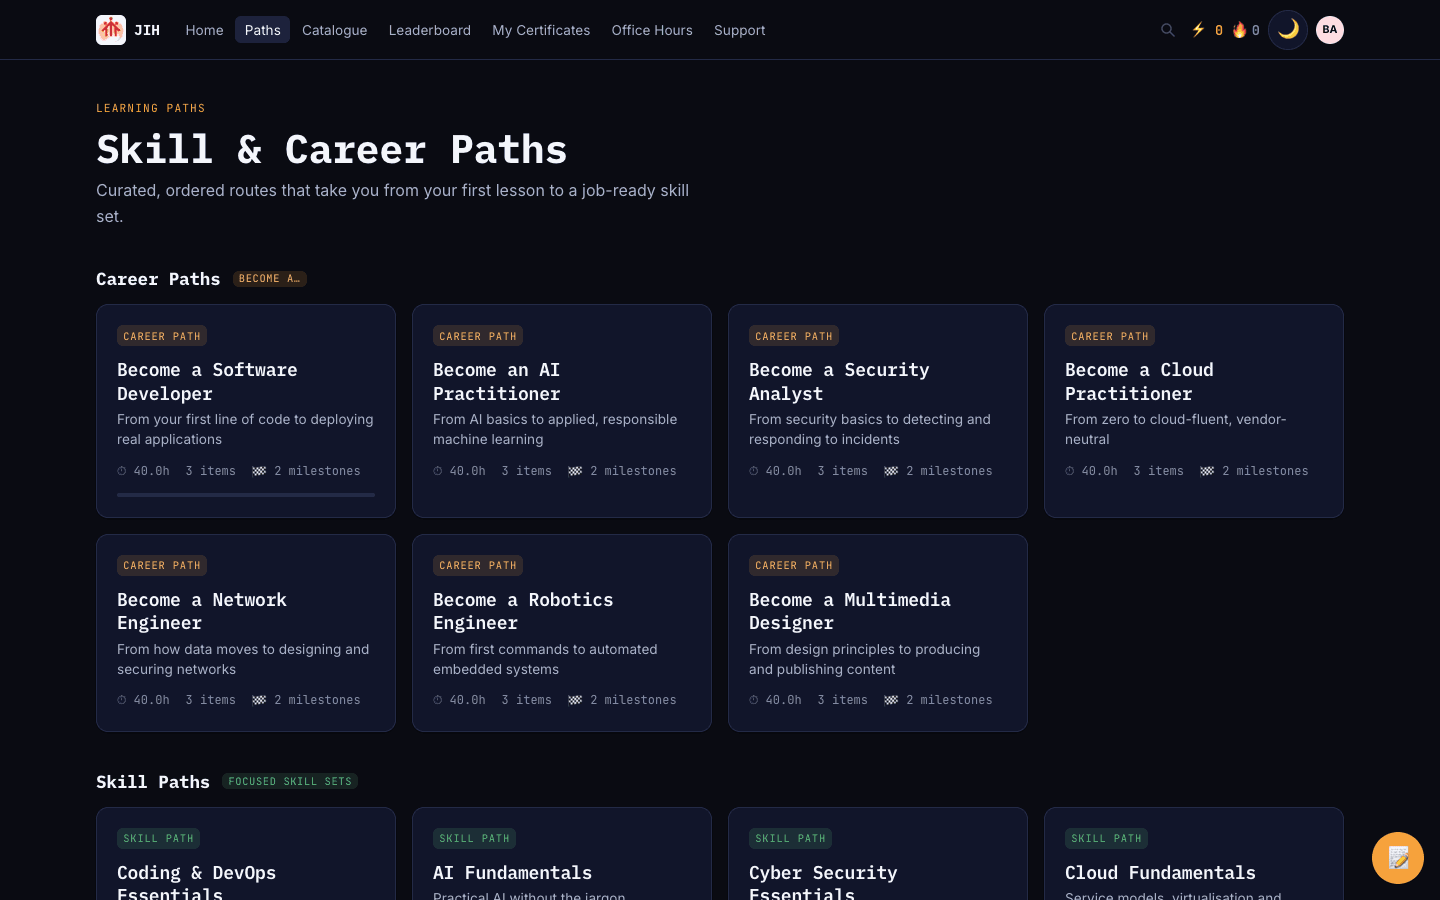
The skill and career paths page with path cards.
Step 5
Take a lesson
Each lesson can include reading, a quiz, and a hands-on lab. The tabs at the top of a lesson switch between its parts, and the checklist at the bottom shows what’s required to complete it.
Read the lesson
The reading is the core of every lesson — clear explanations with examples and code snippets. When you’ve read it, select “Mark as read”. Some lessons also include a short supplementary video.
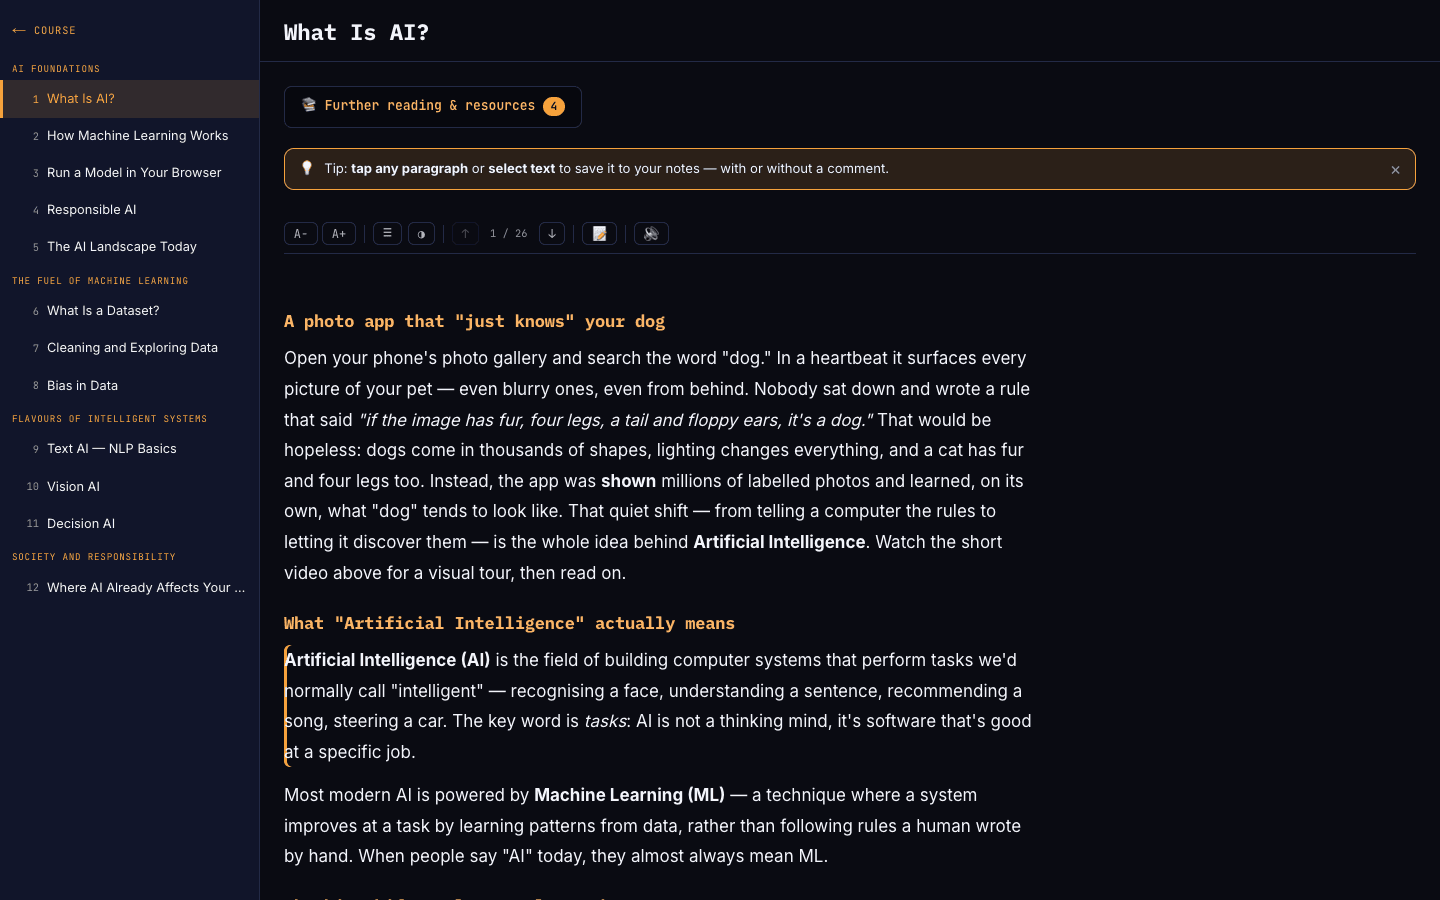
A lesson’s reading view with the syllabus sidebar and content. Take the quiz
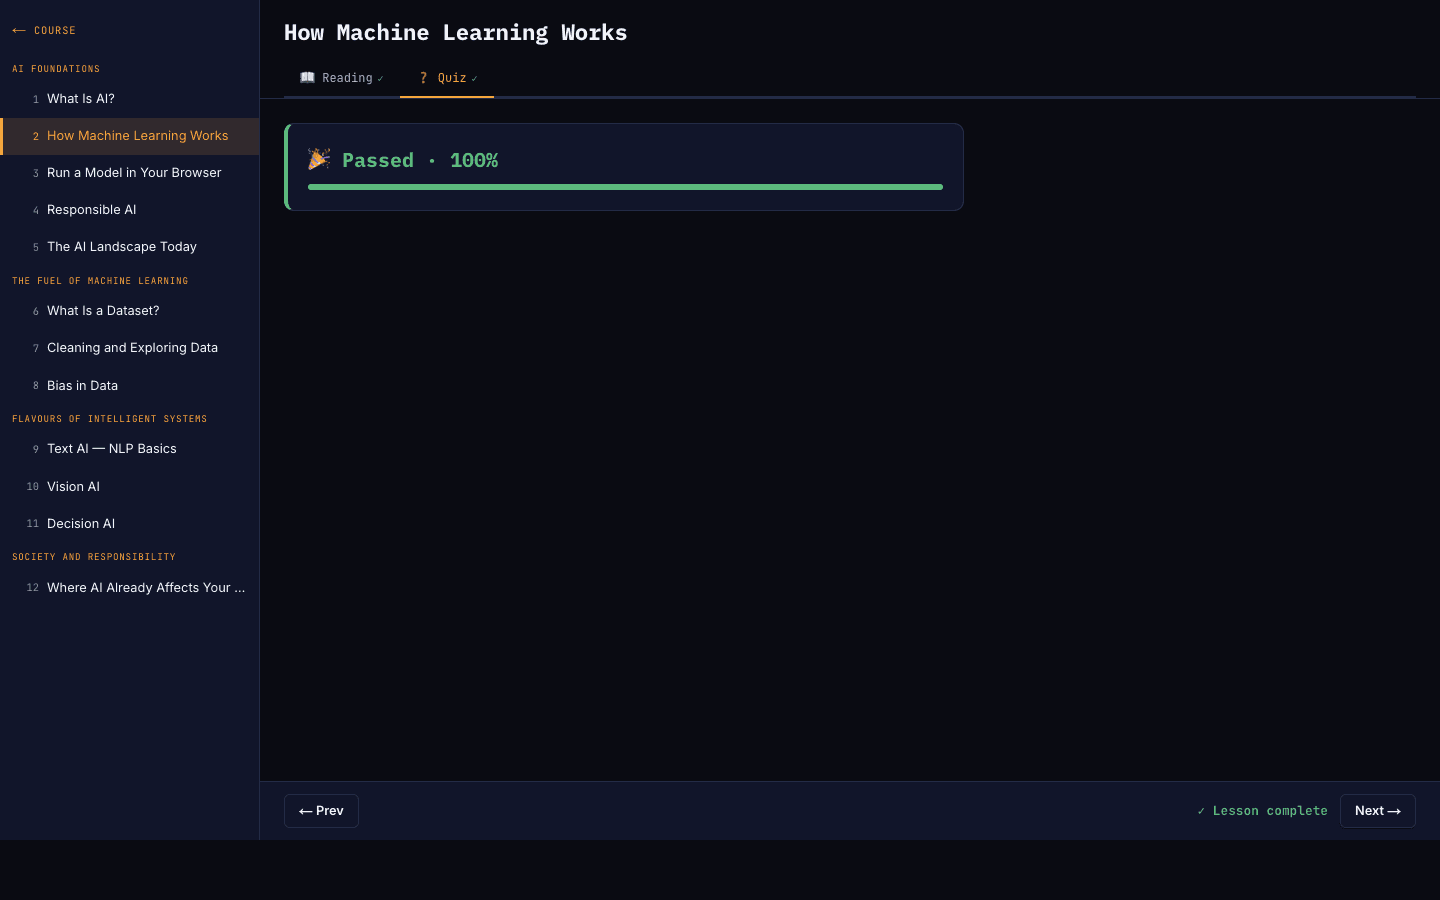
Quizzes check your understanding with multiple-choice, true/false and other question types. Answer every question, then select “Submit quiz”. You’ll see your score and feedback, and can try again if you don’t pass the first time.
A lesson quiz with multiple-choice and true/false questions. Do the hands-on lab
Labs let you practise for real in the browser. Write your solution in the editor, use “Practice” to run a quick check, then “Submit for Grade” when you’re ready. Hints are a click away if you get stuck.
- A lesson is complete only when all its required parts (reading, quiz, lab) are done.
- Completing lessons earns XP and keeps your streak alive.
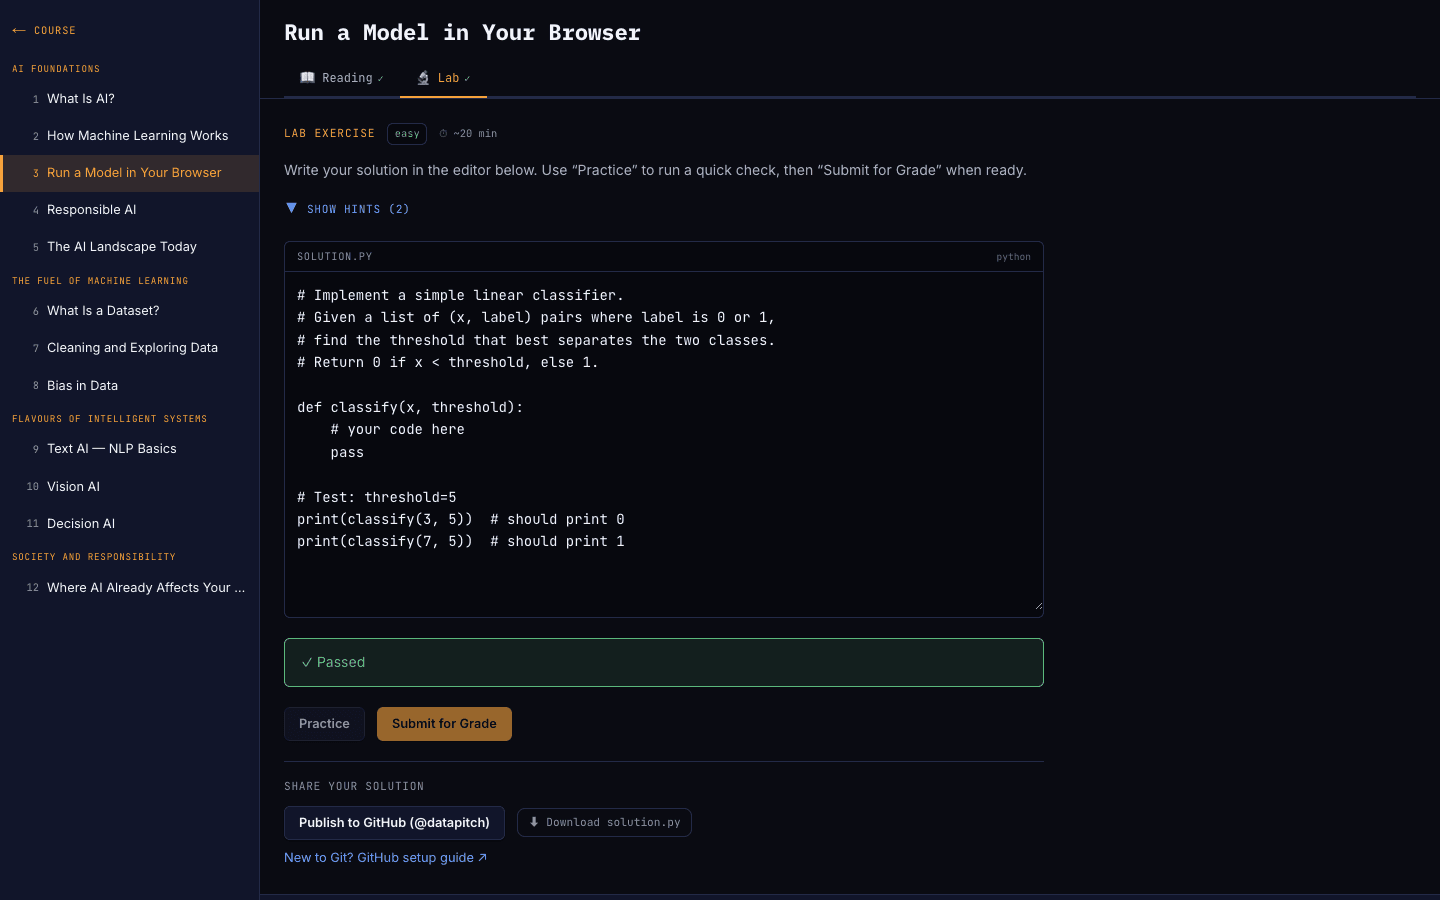
A hands-on lab with a code editor, hints, and Practice / Submit for Grade buttons.
Step 6
Tools inside a lesson
The reading view has a toolbar of study tools so you can learn the way that suits you — resize the text, listen instead of reading, jump paragraph by paragraph, and capture notes and highlights as you go. Your reading preferences are remembered between lessons.
Read your way — text size, spacing & contrast
Use A− and A+ to shrink or enlarge the text, the lines button (≡) to switch between normal and relaxed line spacing, and the contrast button (◑) to turn on high contrast for easier reading. These settings stick across every lesson.
- A− / A+ steps through four text sizes.
- ≡ toggles relaxed line spacing for longer reads.
- ◑ turns on a higher-contrast view.

The reading toolbar with font-size, line-spacing and high-contrast controls. Navigate paragraph by paragraph
On longer lessons, use the ↑ and ↓ buttons (or the Up/Down arrow keys) to move between paragraphs. The counter in the middle — for example “3 / 12” — shows where you are, and the active paragraph is gently highlighted so you never lose your place.
The paragraph navigation controls showing a position counter. Listen instead of reading
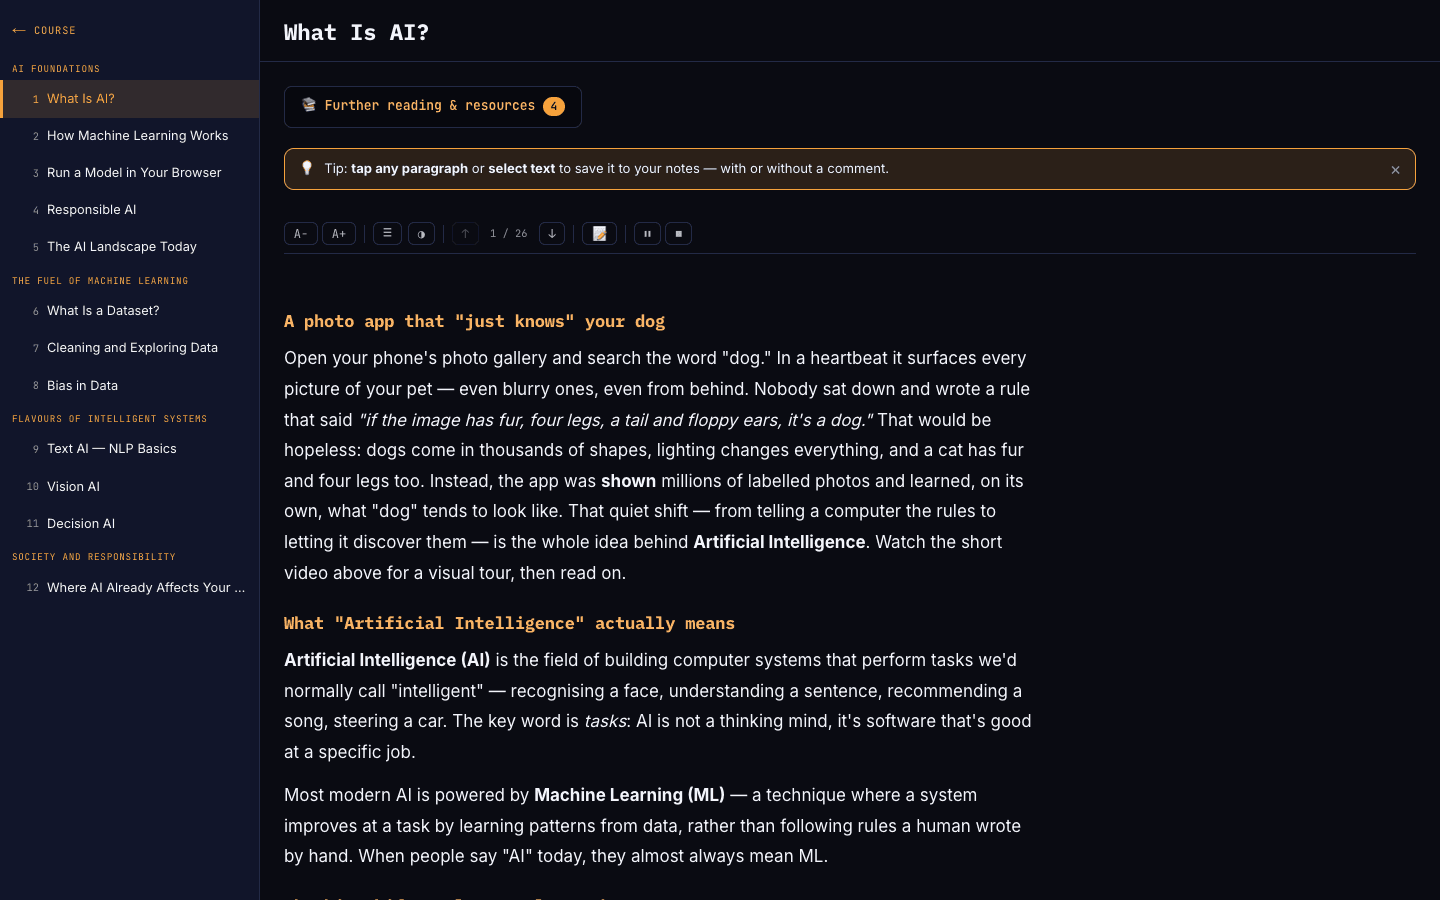
Press the speaker button (🔊) to have the lesson read aloud from your current paragraph. While it plays you can pause (⏸), resume (▶) or stop (⏹) at any time, and it advances through the lesson automatically. Great for revising on the move or for an extra channel alongside the text.
The read-aloud controls in the reading toolbar while audio is playing. Take notes & highlight as you read
Select any text to highlight it in yellow, blue or green, then choose Save to keep it or Comment to add a thought. You can also tap a whole paragraph to save it. Open the notes panel with the 📝 button to read, edit or delete everything you’ve captured — all your notes for the lesson live in one place.
- Highlight colours: yellow, blue or green.
- Save keeps a highlight; Comment adds a note to it.
- In the notes panel, Ctrl+Enter (⌘+Enter) saves a note quickly.
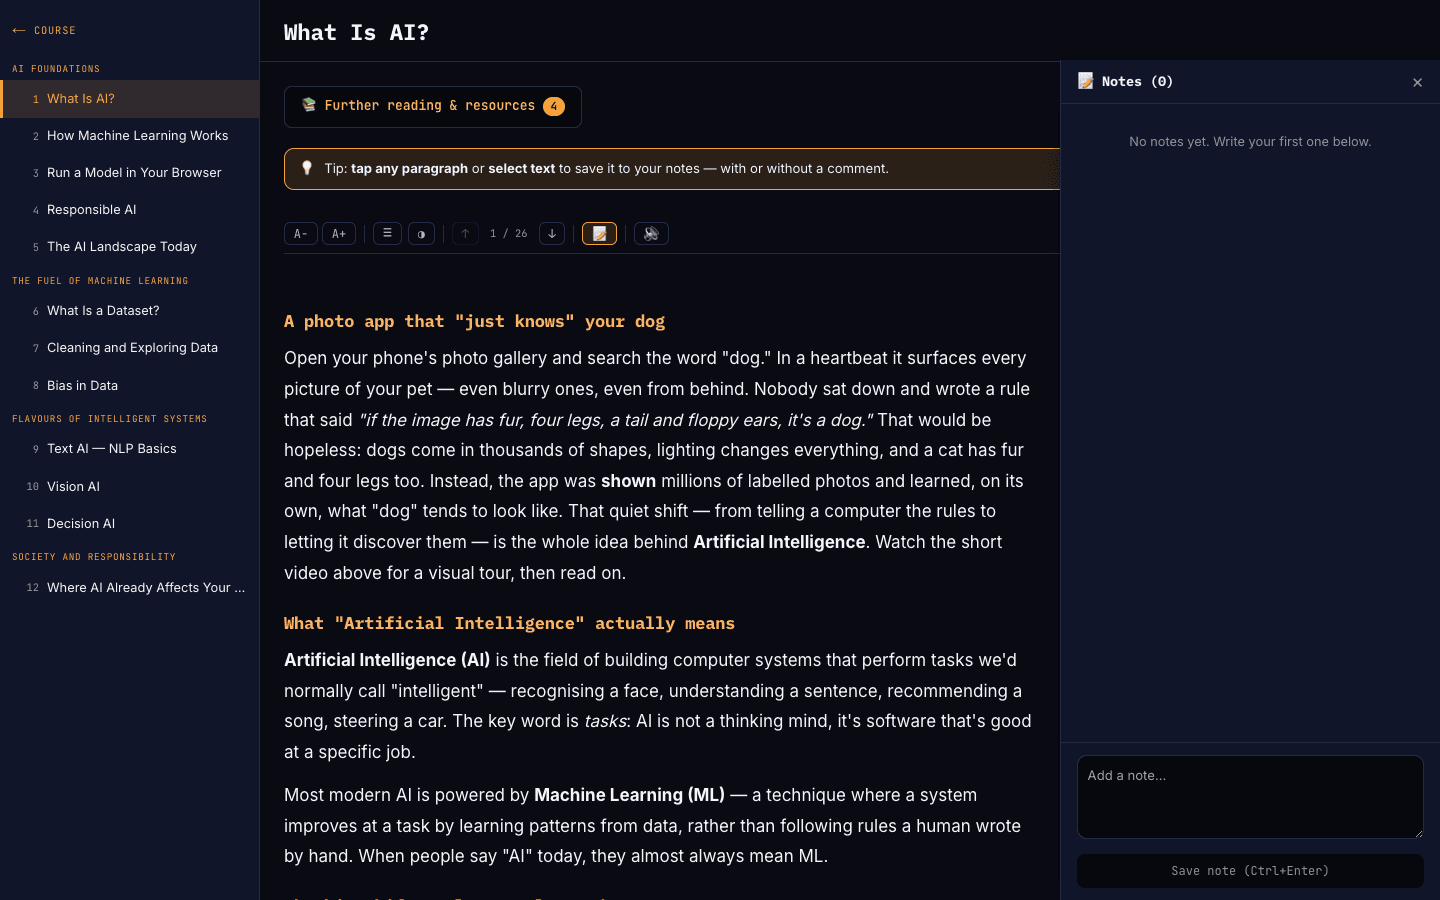
The notes panel open beside the lesson, with saved highlights and notes. Reflect, then mark as read
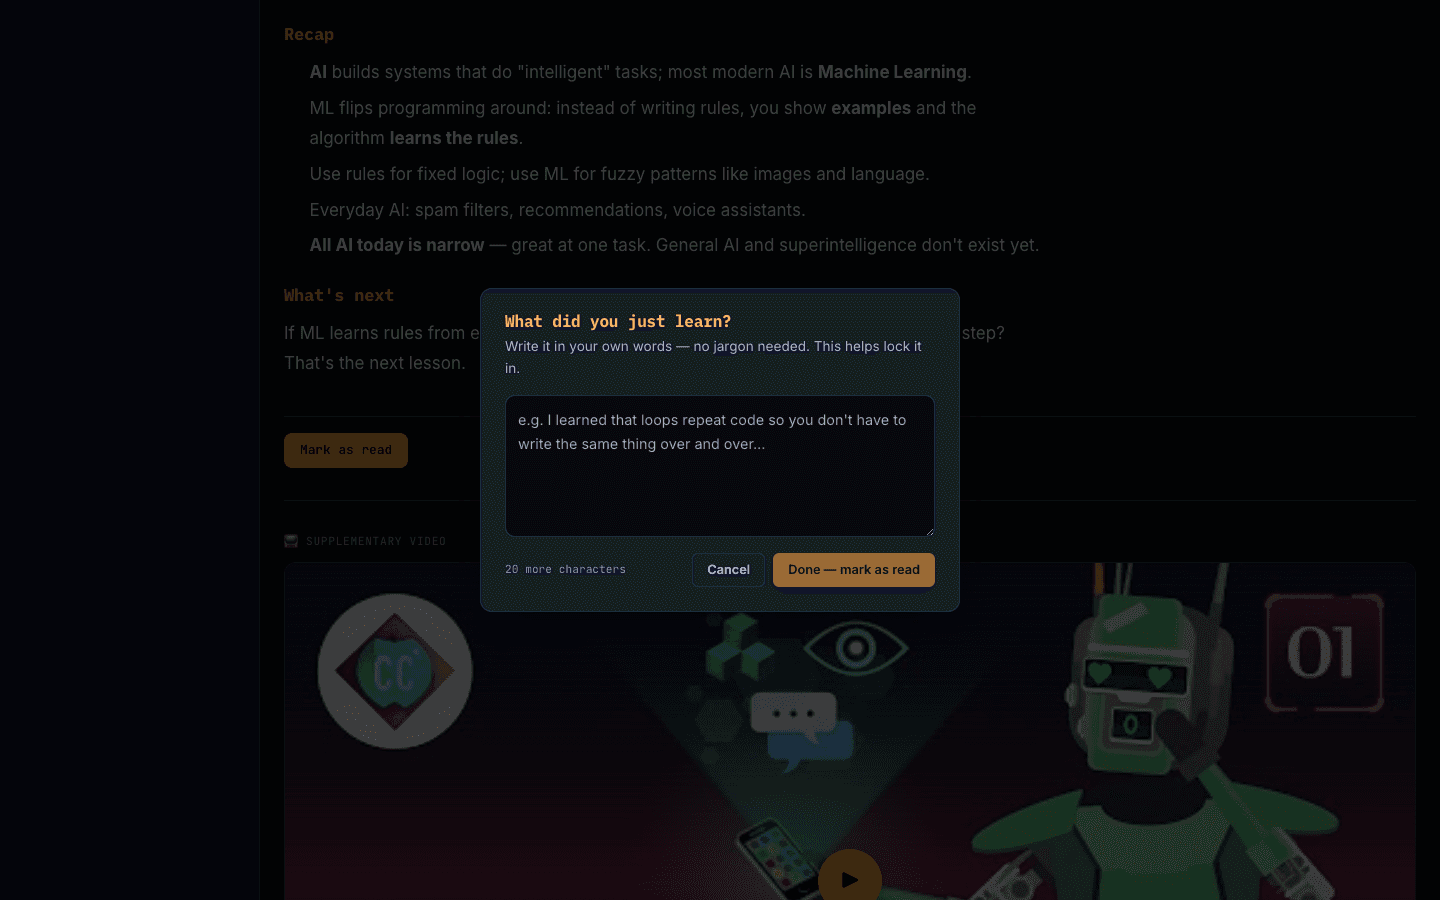
When you select “Mark as read” for the first time on a lesson, you’ll be asked “What did you just learn?”. Write a sentence or two in your own words (at least 20 characters) — this quick reflection helps the material stick, and it’s saved to your notes.
The “What did you just learn?” reflection prompt before marking a lesson as read. Go deeper with further reading
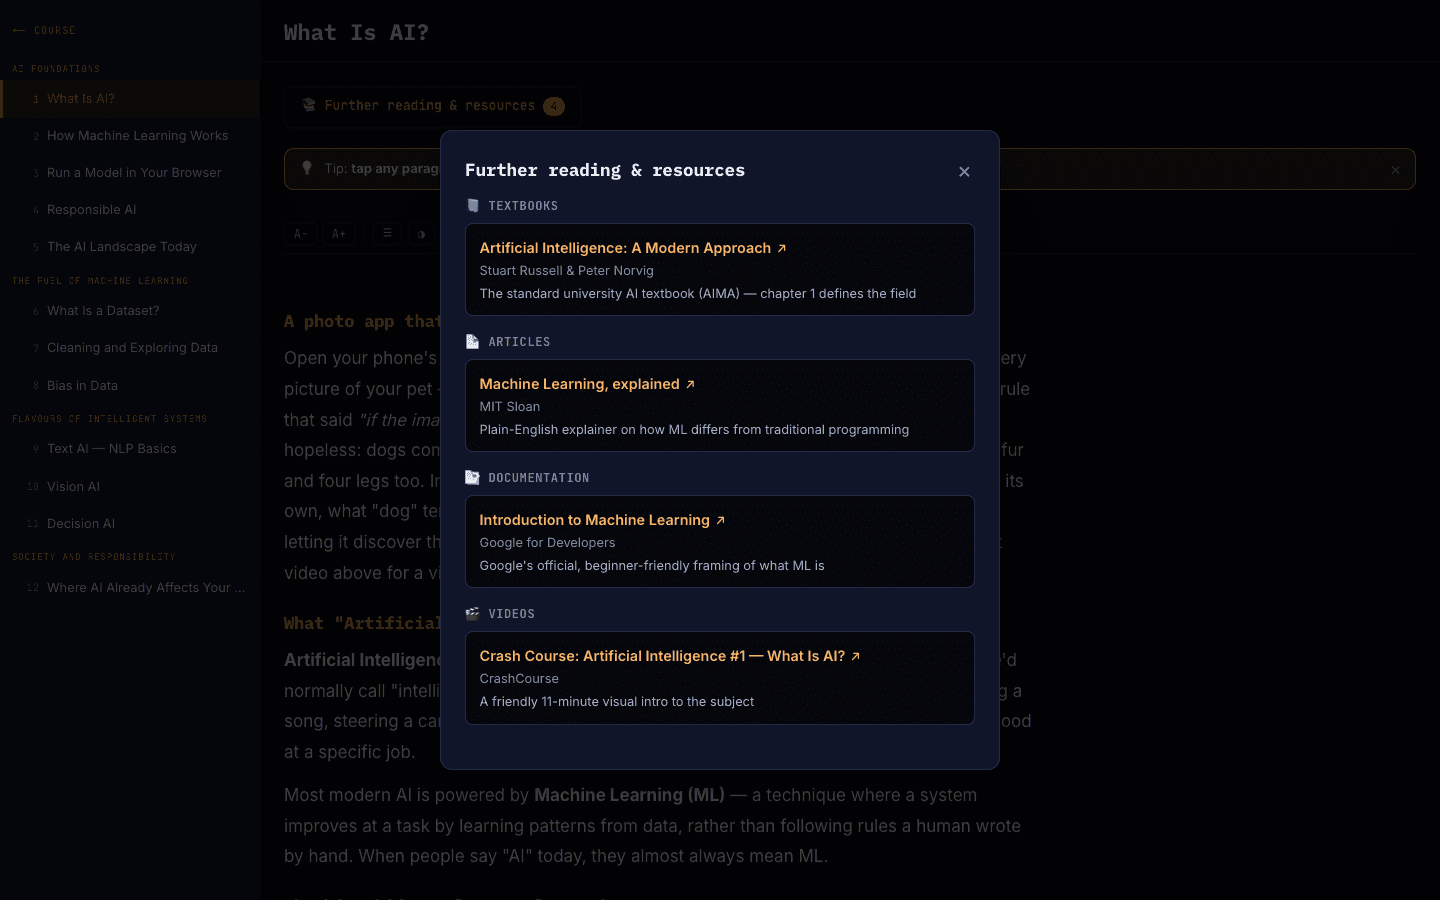
Where a lesson offers extra material, the “📚 Further reading & resources” button opens a tidy list of textbooks, articles and links grouped by type. External links open safely in a new tab so you can explore a topic beyond the lesson.
The further reading & resources panel listing curated materials.
Step 7
Track your progress
JIH turns your effort into momentum — XP, streaks, leaderboards, a visual journey map, and certificates you can share.
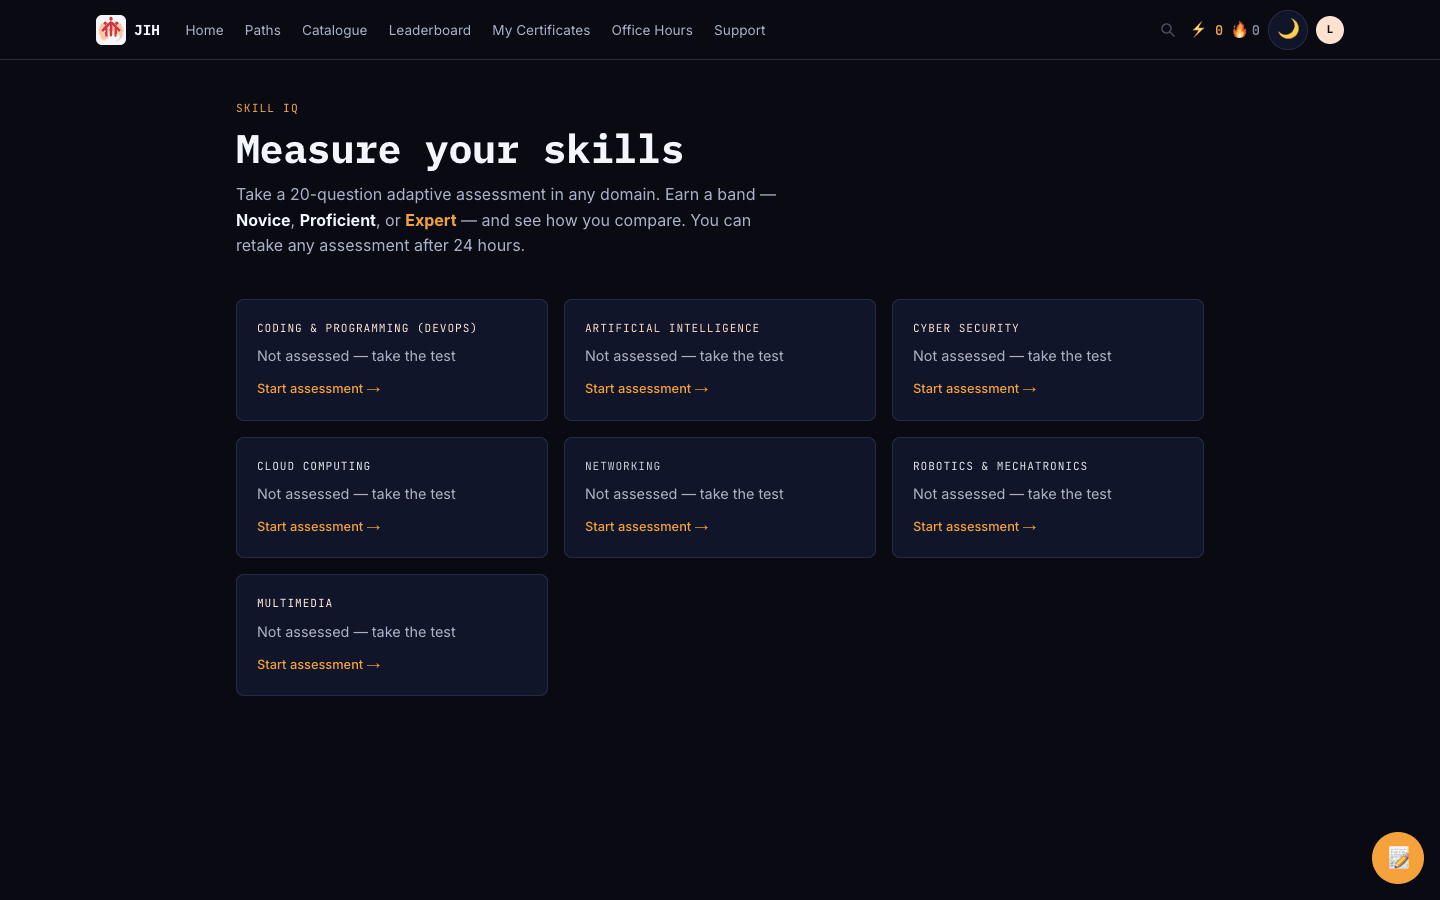
Measure your skills with Skill IQ
Take a short adaptive assessment in any domain to earn a band — Novice, Proficient, or Expert — and see how you compare. You can retake an assessment after 24 hours.
The Skill IQ page with domain assessment cards. Climb the leaderboard
Earn XP by completing lessons, passing quizzes and finishing labs. Switch between weekly, monthly and all-time views, and compare against the whole community or just your cohort.

The leaderboard with weekly / monthly / all-time and global / cohort toggles. See your journey map
The journey map visualises every course you’ve started and how it connects to skill and career paths. Hover a node to trace connections, and click to jump straight into a course.
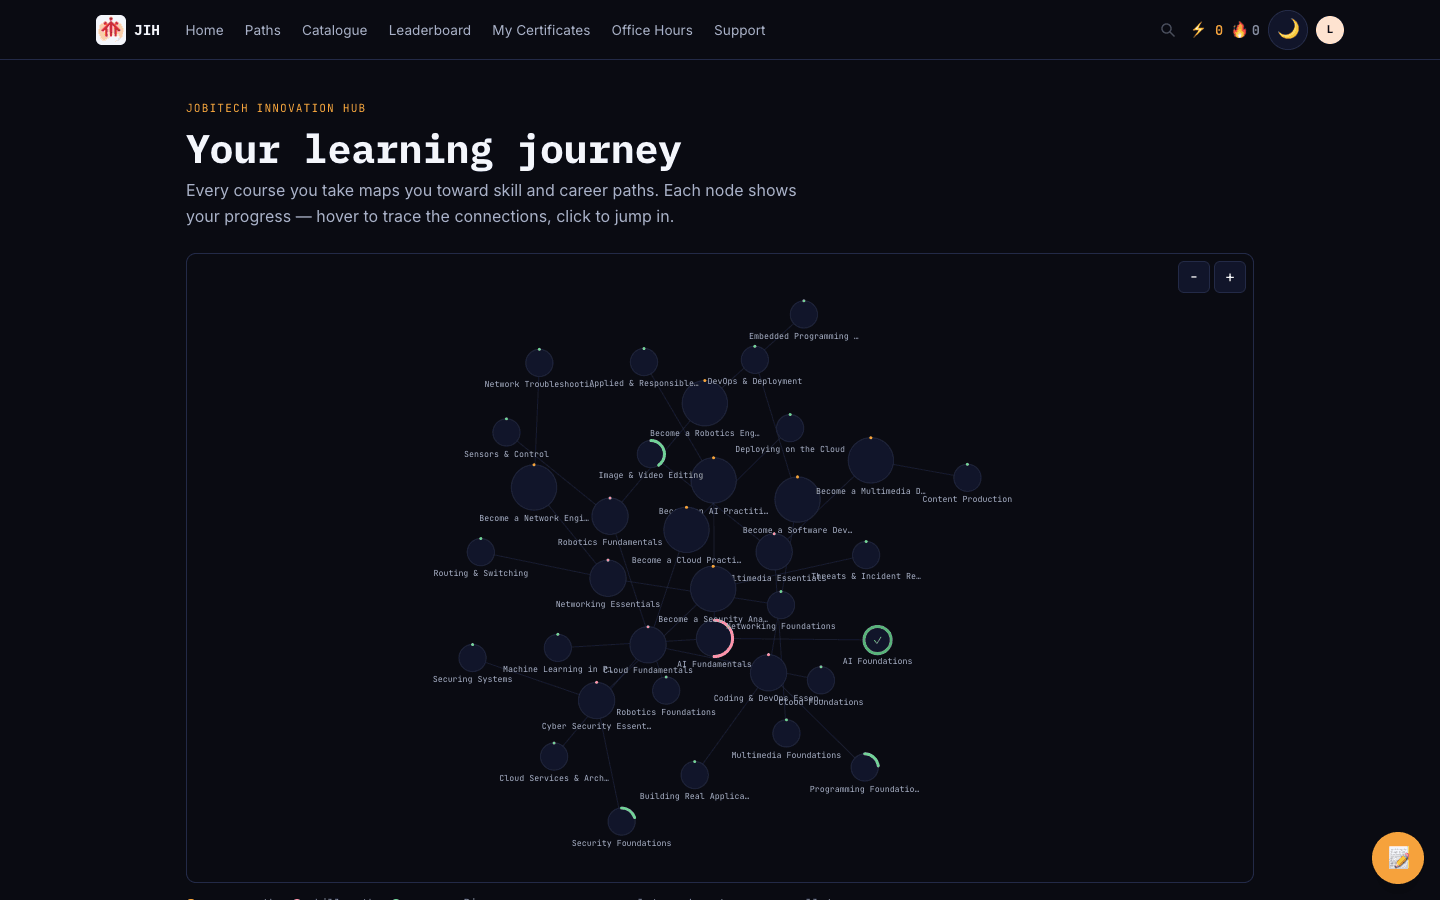
The learning journey map showing courses and paths as a connected graph. View your profile & certificates
Your profile gathers your XP, streak, recent activity and the certificates you’ve earned. Each certificate has a public verification link you can share with employers.
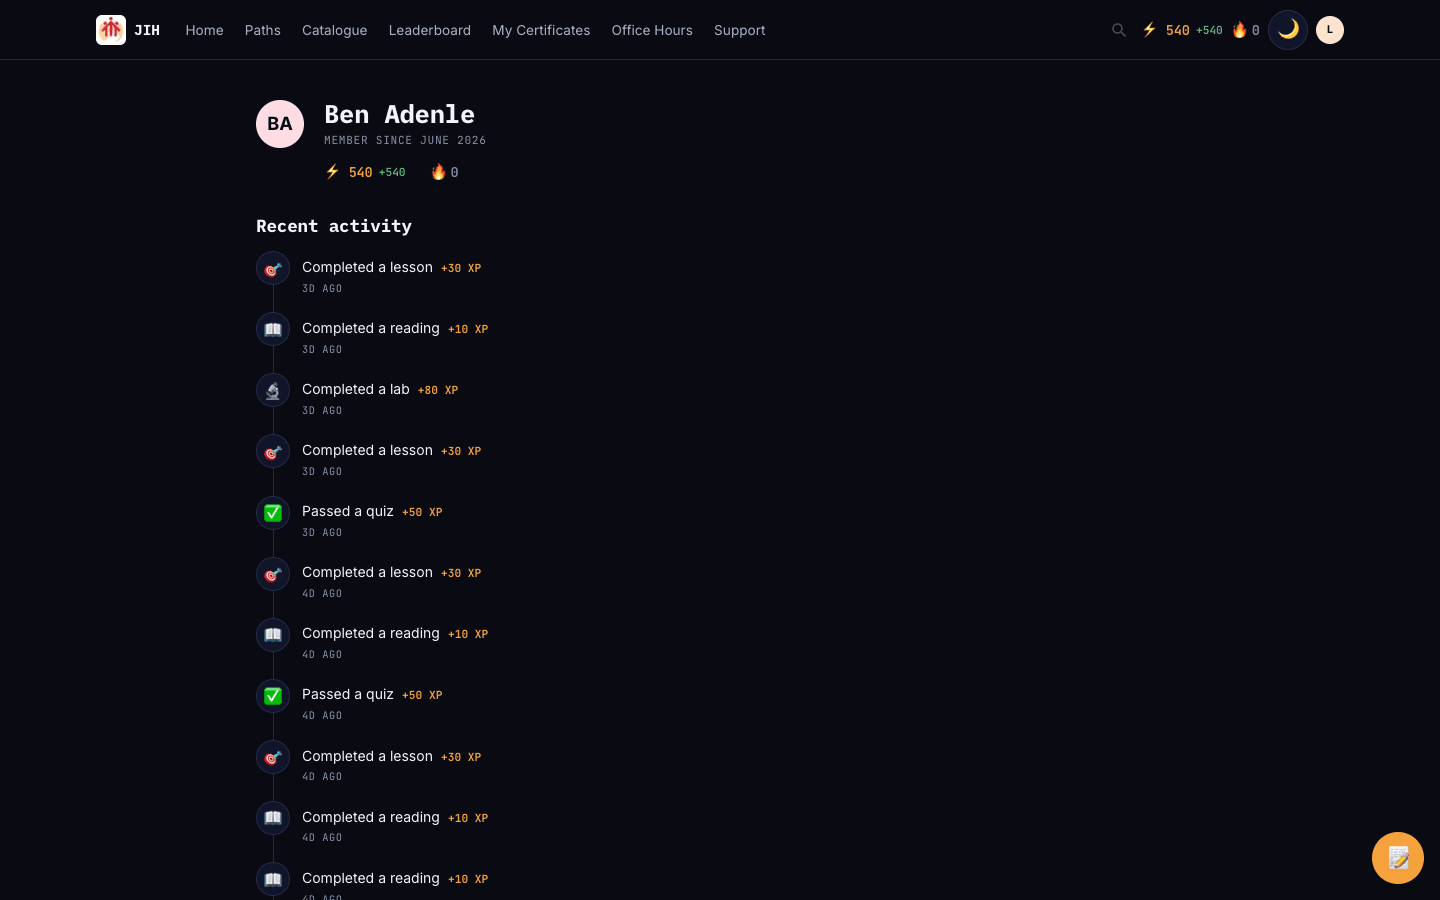
The learner profile with XP, recent activity and certificates.
Step 8
Study offline with the desktop app
Install the JOBITECH Innovation Hub desktop app (Windows and macOS) to download courses and keep learning without a connection — on the train, in a lab with patchy Wi-Fi, anywhere. Everything you do offline syncs back to your account the moment you reconnect.
Install & sign in
Download the desktop app from the Downloads page in your browser, install it, and sign in with the same account you use on the web. It’s the full JOBITECH Innovation Hub — just on your desktop.
The desktop app sign-in screen. Your offline home
The desktop app puts your courses in a tidy sidebar and shows whether you’re online or offline at a glance. Browse, learn and track XP and streaks exactly as you do on the web.
The desktop app dashboard with the sidebar and online indicator. Download a course for offline study
Open a course you’re entitled to and choose “Download for offline”. A progress indicator shows lessons being saved to your device — reading, quizzes and labs come with you. (Videos still need a connection.)
A course downloading for offline use in the desktop app. Manage offline storage
The Downloads area shows what you’ve saved and how much space it uses. Set a storage cap, choose to download on Wi-Fi only, and press “Sync now” to push your offline progress whenever you’re back online.
- Quiz and lab attempts made offline are graded by the server when you sync.
- Finish a course offline and you’ll get a provisional certificate, confirmed on sync.
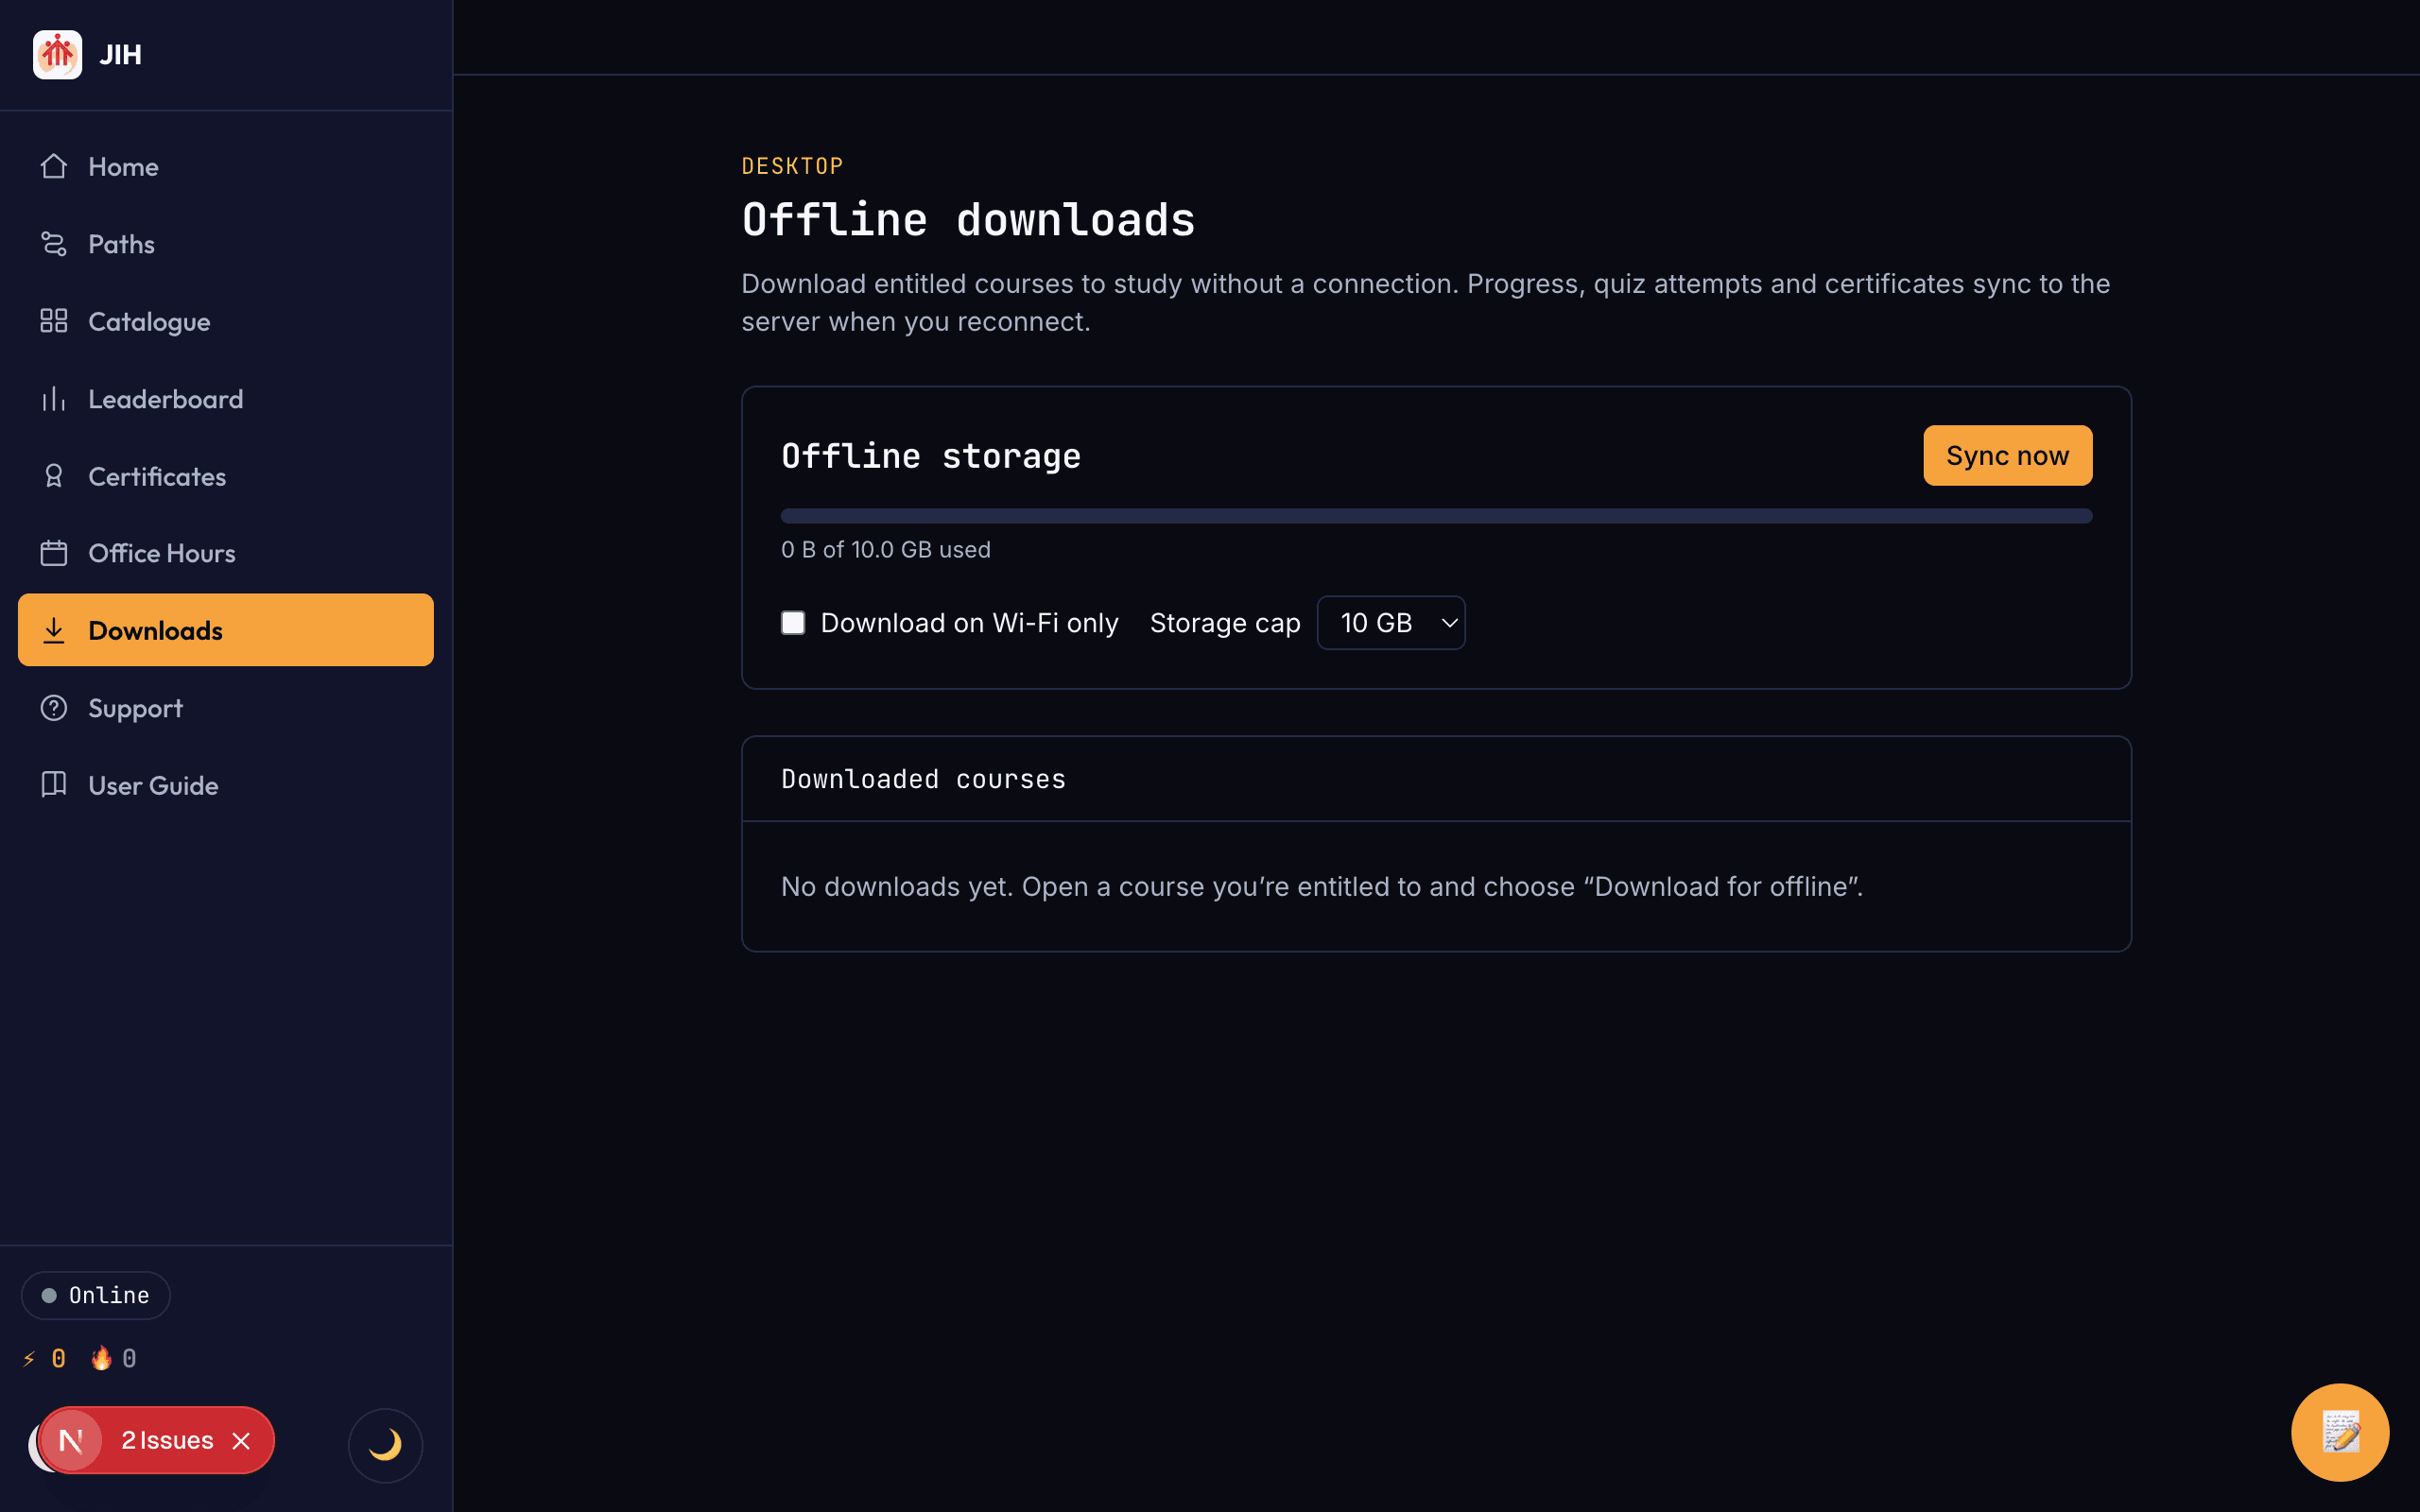
The desktop app offline storage and downloads manager.
Step 9
Get help & manage your account
Live sessions, support tickets, account settings, reference guides and offline study are all a click away.
Join live office hours
Office hours are live Q&A sessions with instructors. Browse upcoming sessions, check the seats remaining, and select “View & enroll” to reserve your place and get the meeting link.
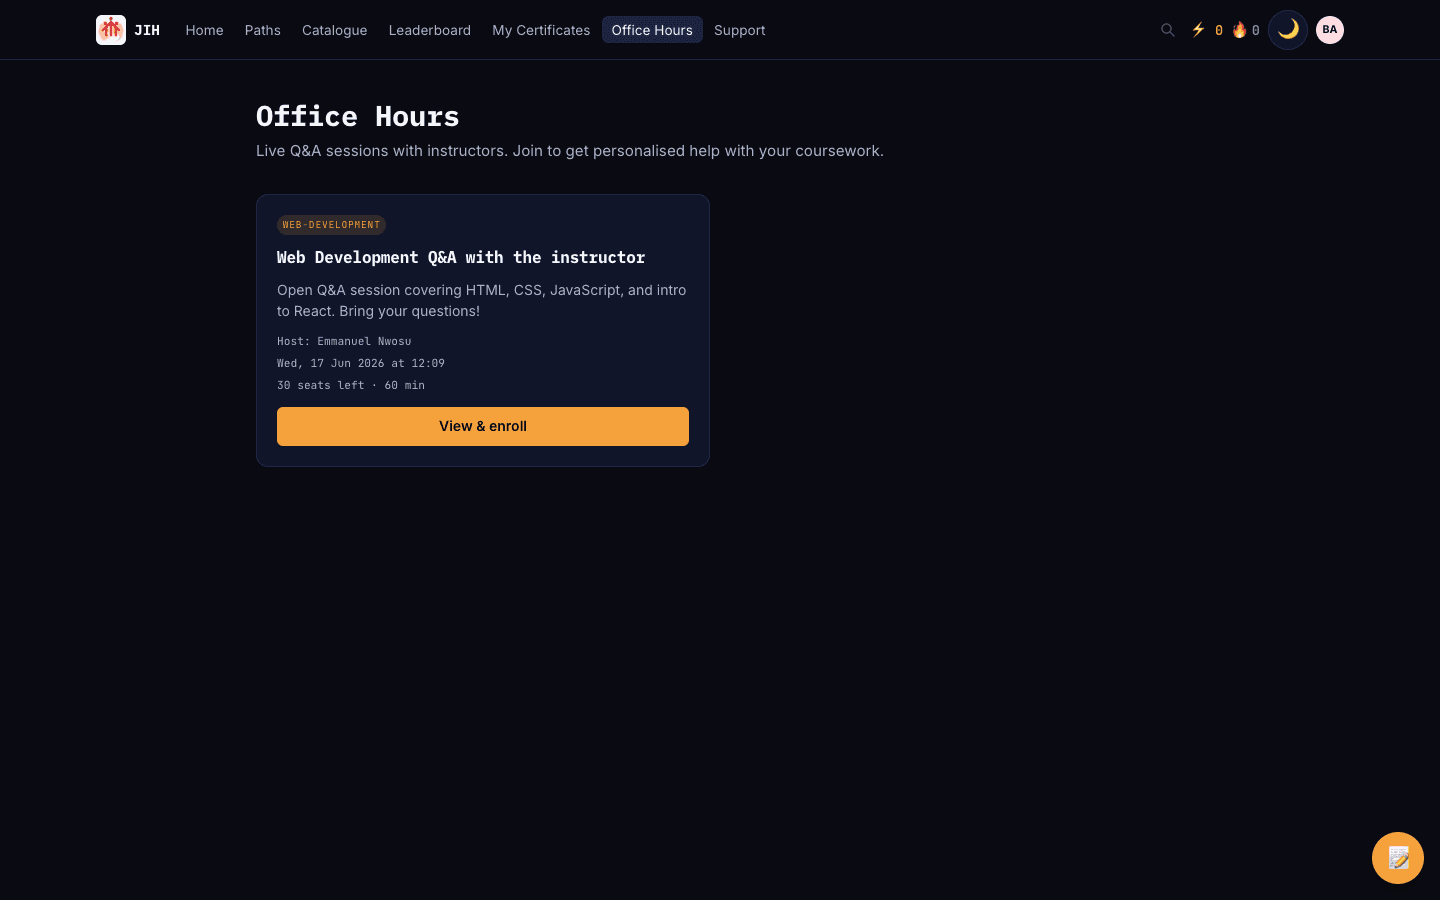
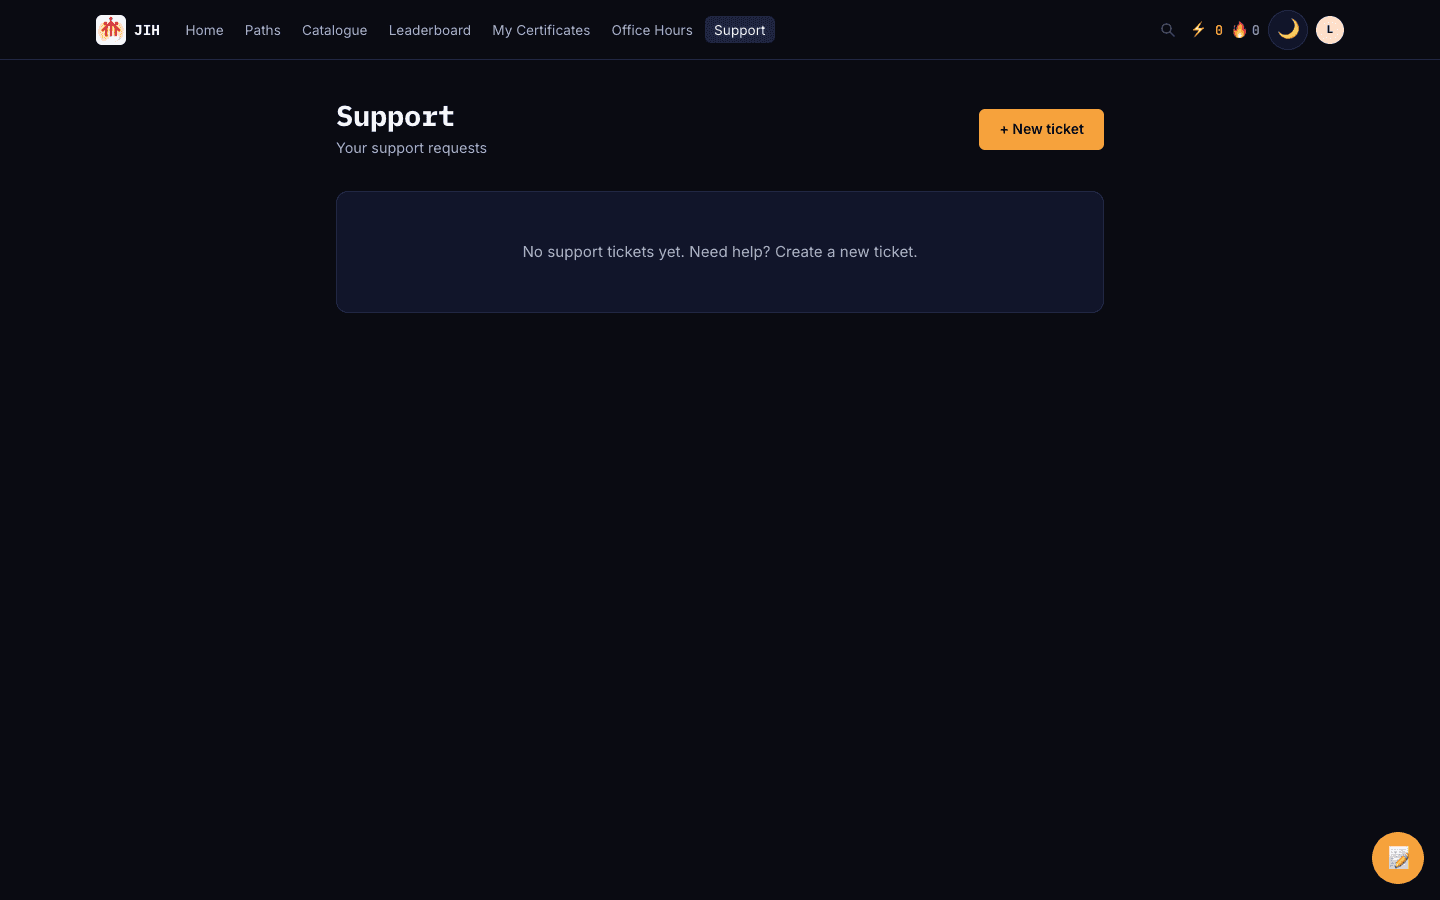
The office hours page listing an upcoming live session. Raise a support ticket
Need a hand? Open Support and select “New ticket”. Choose a category, describe the issue, and the team will reply in the same thread.
The support page with a New ticket button and empty-state message. Manage your settings
Update your name and avatar, manage security and connected accounts, set email preferences, review your subscription, and control privacy — all from Settings.
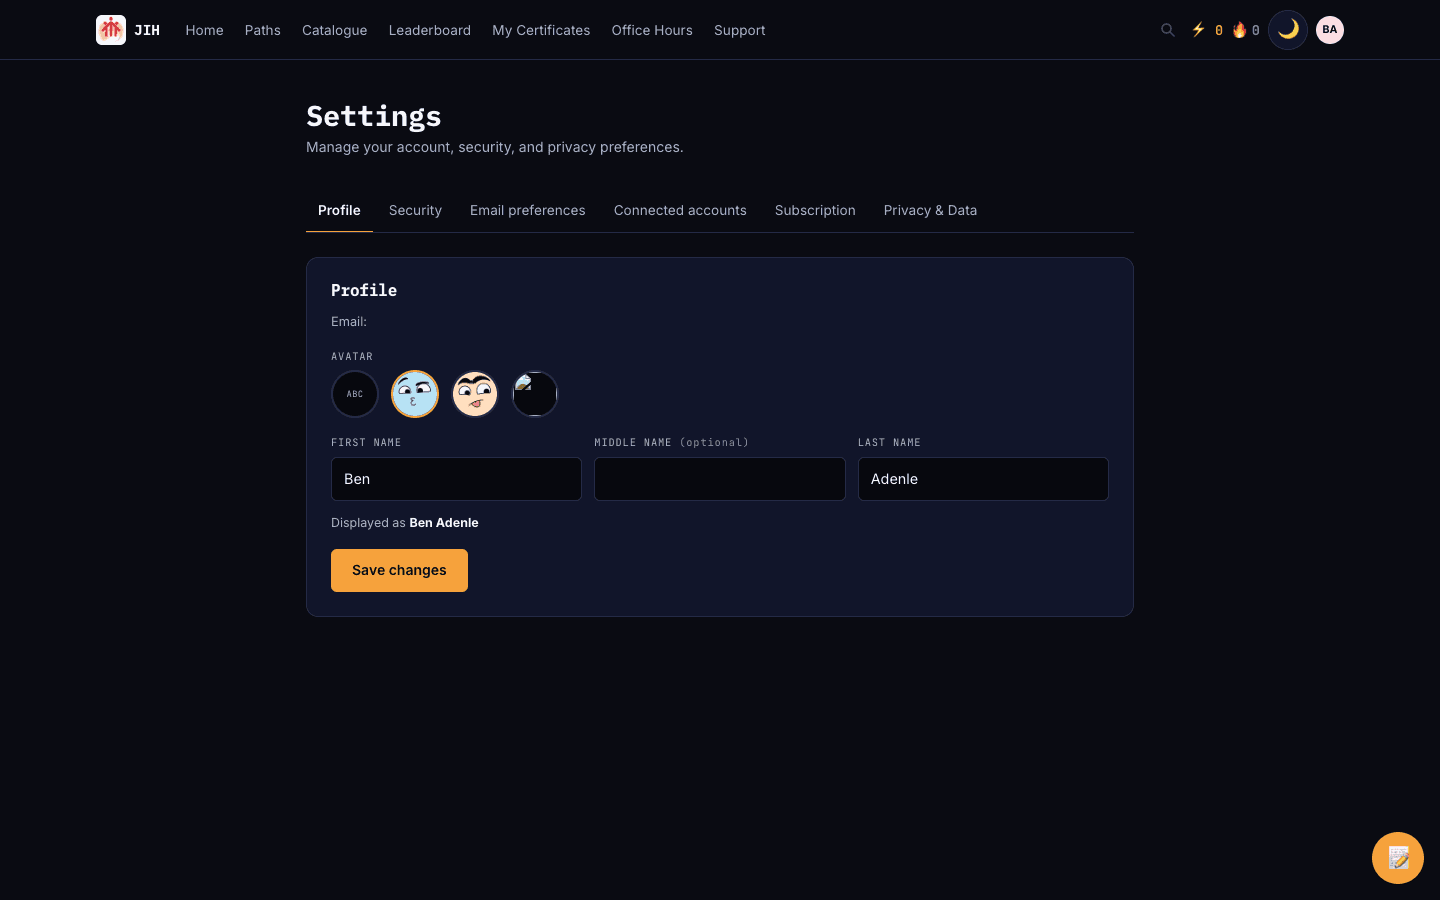
The account settings page with profile, security and other tabs. Read the reference guides
The Help & Guides section has vendor-neutral reference articles — like the Git & GitHub crash course — for tools and topics you’ll meet in your courses and labs.
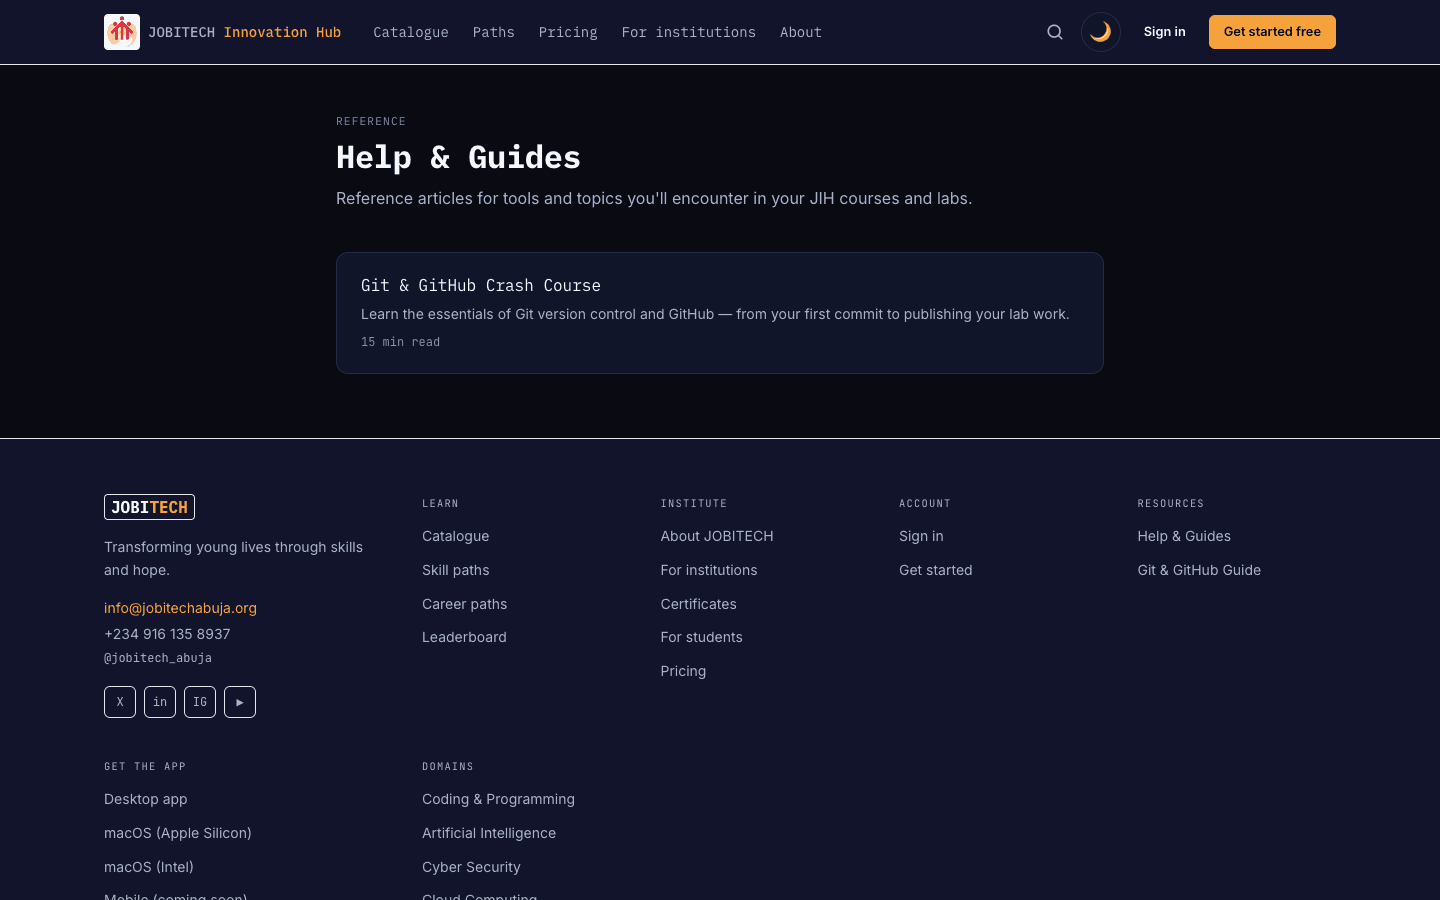
The Help & Guides reference page.
Looking for something else? Back to all guides · Reference articles